Thanks to the availability of special web services and applications, you can easily find a person by photo.
Most modern programs and websites use artificial intelligence technology.
It allows you to increase the accuracy of facial recognition in a photo as the number of program users increases.
It should be understood that no search engine can give a 100% guarantee of finding an image. Often errors occur when reading pixels, or the browser searches for photos that are similar in meaning and color palette.
Below are some of the most effective ways. If one of them does not help you, feel free to move on to the other.
Ultimately, one of the methods will turn out to be the most suitable for your picture and the person will be found. We also recommend that you carry it out using several photographs at once, if you have them.
ServiceGoogle
The first and easiest way to search by image is the well-known Google. The developers of the popular system have introduced a function for working with user images.
Now you can not only enter a query, but also insert individual images into the text field. The search engine carries out analysis for all sites and social networks that are indexed in the system.
Let's look at simple example how to use the function:
- Let's go to the website. This page differs from the standard one by the presence of an additional button for adding;
- To get started, click on the camera icon. A window for selecting the type of photo upload will appear. The user can provide a direct link to an image already posted on the Internet or download graphics from the computer’s memory;
- Click on the “Search by image” button.
The result of processing your request in Google will look like this:
It will automatically indicate the person's name or subject. Also, the user will be able to view similar images. Another element of search results are pages that mention the person found.
Often, the result only shows similar images without providing a name. This means that there are too many similar pictures on the Internet and the system cannot find a 100% exact match. Try scrolling down to the "Pages with matching images" box. This way you can view a list of links that contain what you are looking for.
With it you can search not only for people, but also for various objects. As practice shows, a search engine can be very useful when you need to find out the name of an unknown item or find things you like.
Yandex
Photo search from Yandex is another popular service that searches for graphic content across all sites. At first glance, it is practically no different from Google, except for the interface and design. However, Yandex developers claim that their system uses a modified algorithm using computer vision.
This way, by using both systems, you can have a better chance of finding the one you're looking for. To start the analysis, go to the main site. Find the text line and next to it click on the “Pictures” tab to go to the corresponding section:
- In the tab that opens, click on the camera icon;
- Now in the tab that opens, click on the button to load a photo from your PC memory or provide a direct link to the picture on the Internet. Click on “Find”;
The result will be a set of the most similar images with which you can find a person. Also, you can select different picture sizes and continue the analysis with a better quality photo. Be sure to look at the list of mentions on other sites to increase your chances of discovering the person.
Analysis by photo inVK
In addition to standard systems, there are a lot of services for monitoring by photo only in specific social networks. Since 95% of Runet users have a profile on VKontakte, it is better to search for it using special resources that work only with this social network. This way, you will reduce the analysis time and the number of similar pictures.
To start monitoring photos on VK, you need to install an extension for the Chrome browser. The app is called "StopFake". Go to the software store and enter the name of the extension. Then click on the install key and wait for the button to appear in the upper right corner.
Although the program is designed to quickly identify fake accounts, it can also be used to find people. You will need to upload a photo to your album on VKontakte, since this can only be done using the one that is in the site’s database.
- Open the photo in your VK album. The album can be private, the main thing is that it is on the website;
- After opening the image, press the button to launch the StopFake extension. It is located in the upper right corner of the browser toolbar. To eliminate possible errors in the operation of the utility, we recommend restarting the browser immediately after installing the extension;
- It will automatically detect them in social network, which contains the desired photograph. Thanks to the author's signature, you can easily find the person you need. Click on the author's name to go to it.
To do this, follow these steps:
- Open the photo posted by him personally. Since information is only visible here about the place where it was taken, it is better to choose home photos;
- See if it is geotagged. They are indicated under the “Like” button.
If the address is indicated on a recent photograph, and the place on it is located in the city where you live, consider yourself lucky. It is easy to find a person using these coordinates. In the same way, look at the location on photos in albums and on avatars.
If you don't want to be found in the same way, turn off location display in the page settings. Also remove any marks you have already made on the uploaded photos.
This won’t take much time, since you can delete a geotag in just three clicks:

The new setting will be saved automatically.
Alternative Methods
If there are no marks on the VKontakte photo, social engineering will come to the rescue. To find a user, you should carefully study his page, friends and subscriptions - some of this will one way or another indicate the user’s location.
First of all, look at where the person comes from. The current place of residence is sometimes not indicated, but the city of birth, which is listed in the detailed information about the page, most likely is. Check to see if the person still lives there.
It also contains information about the school, work or university where the user is studying. Knowing this data, determining the location of a person will not be difficult.
Then you should carefully look at his friends. The easiest way to determine your place of residence is by relatives and school friends.
If they are not there, open all the pages in turn - whichever city you see most often is where the user you are studying usually lives. Next, go to the menu of his subscriptions. Quite often you can find that a person is a member of a group in the city in which he lives - this could be a news public or a community in the “Overheard” format.
This method is very reliable and convenient, since it is possible to identify a person sitting in such a group, even if his page information and friends list are hidden.
It is not recommended to use applications and programs that supposedly identify people by IP address - this is 100% likely to be a scam, since this is simply impossible. The address itself is obtained using a sniffer - a traffic analyzer, usually built into fraudulent sites.
Let's say you have some kind of image (drawing, picture, photograph), and you want to find the same (duplicate) or similar one on the Internet. This can be done using special tools from Google and Yandex search engines, the TinEye service, as well as the amazing PhotoTracker Lite browser extension, which combines all these methods. Let's look at each of them.
Search by photo in Google
- Provide a link to the image on the Internet
- Uploading a file from a computer

As a result we get full list similar pictures from the image that was chosen as a sample:

There's another one good way, working in Chrome browser. While on the page with the image you are interested in, move the mouse cursor to it, right-click and in the tooltip that opens, select “Find image (Google)”:

You will be immediately taken to the search results page!
Search by images in Yandex
With Yandex, everything is no less simple than with Google :) Follow the link https://yandex.by/images/ and click the camera icon in the upper right corner:
Enter the address of the image on the Internet or upload it from your computer (you can simply drag it to a special area at the top of the browser window):
The search result looks like this:

You instantly have access to the following information:
- What are the online dimensions of the image you uploaded as a sample for searching?
- List of sites where it appears
- Similar pictures (modified based on the original one or based on which the algorithm decided on their semantic similarity)
Many people have probably already heard about online service TinEye, which Russian-speaking users often call Tinai. It is developed by experts in the field machine learning and object recognition. As a consequence of all this, Tinay is great not only for finding similar pictures and photographs, but their components.
TinEye's indexed database of over 10 billion images is the largest in the entire Internet. “Everything can be found here” - this phrase perfectly characterizes the service.

![]()
There is another way to search in one click. By default, the “Show quick search icon” item is activated in the application settings. When you point at a photo or picture, a round green icon pops up, clicking on which starts a search for similar images - search results for Google, Yandex, Tinay and Bing will automatically open in new tabs.

The extension was created by our compatriot, whose hobbies are closely related to photography. He originally created this tool to quickly find his photos on other people's sites.
When you might need it
- You are a photographer, you post your photos on the Internet and want to see on which sites they are used and where your copyrights may be violated.
- You are a blogger or copywriter, write articles and want to choose an “unhackneyed” image for your material.
- What if someone uses your photo from your VKontakte or Facebook profile as an avatar on a forum or a fake one? account on any social network? But this is more than possible!
- You found a photo of an actor you know and want to remember his name.
In fact, there are a huge number of cases when searching by photo can be useful. You can give another example...
How to find the original of a given image
For example, you have some kind of photograph, perhaps cropped or photoshopped, and you want to find its original, or a better quality version. How to do this? Conduct a search in Yandex and Google, as described above, or using PhotoTracker Lite and get a list of all images found. Next, follow the following:
- The original image is usually larger and of better quality than the altered copy resulting from cropping. Of course, you can set a picture to any size in Photoshop, but when you enlarge it relative to the original, artifacts will always be observed. They can be easily noticed even with a cursory visual inspection.
- Original photographs often have watermarks indicating the author of the photo (last name, website address, company name, etc.). Of course, anyone can add a watermark to absolutely any image, but in this case, you can look for a sample photo on the website or by the author’s last name, he probably posts his portfolio online somewhere.
- And finally, a very simple sign. If your sample photo is black and white (sepia, etc.), and you find the same, but full-color photo, then you obviously do not have the original. much more difficult than converting a color photo to black and white :)
Friends, after reading this article, you can easily find out where this or that photo was taken, the time and date of shooting, the name of the attraction captured on it, and much more. It's very simple, but many will consider you just a wizard! :)
To begin with, I’ll tell you the backstory of what prompted me to write this material... A week ago, my neighbor sent me a couple of photos of beautiful boletus mushrooms via Skype. He wrote that he found mushrooms nearby in the forest, and that I would never guess where exactly.
You can’t imagine what his surprise was when literally five minutes later I told him not only the settlement nearby from that very forest, but also marked with a flag on the Google map the place where exactly he found these mushrooms. :) How did I do this?
The vast majority of modern models mobile phones equipped with a GPS module. By default, when you take a photo with your smartphone in technical information about the photo ( EXIF data) in addition to a large set of all sorts of parameters, the geographical coordinates of the shooting location are also included. Analyzing them is not difficult.
One of the best and most visual EXIF data viewing services is pic2map. I’ll say right away that there are quite a lot of services of this kind, but personally, I like this one better both in terms of the method of presenting data and in terms of their accuracy.

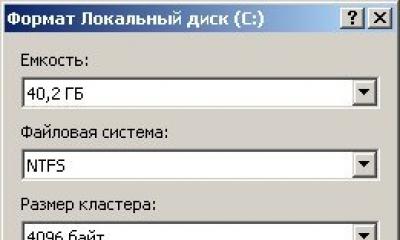
To upload a photo for analysis, click on the “Select Photo Files” button. Check the “Keep photos private” option if you do not want your uploaded photos to be indexed by search engines and/or appear in the service gallery. This way you can maintain the confidentiality of your data, which is important for some users.

Based on the EXIF data, the service will mark on the mapGoogleMaps the exact location where the photo was taken, and will also provide additional information:
- Smartphone model
- Date of shooting, day and exact time
- Country, city, address
- GPS latitude and longitude coordinates
- Shutter speed, ISO, aperture, using flash when taking photographs
- Size, weight, file resolution, etc.

If the picture was taken inside a building, the service will give not only its exact address indicating the street name and house number, but also the postal code (see above in the screenshot)!
As I already mentioned, the above method is applicable if the smartphone or digital camera has a GPS module. Well, how can you find out a place from a photograph if it was taken on a regular digital point-and-shoot camera?
In this case, you can use the function image search fromGoogle or Yandex. However, the method has one limitation: the photo must contain some recognizable place or landmark. For example, I took this image from my personal photo archive:


If the photo shows, for example, a birch tree in a field or a girl with a flower, then this method, of course, will not work - there is simply nothing for the Yandex or Google image analyzer to “catch onto.” In other cases it works well.
From time to time, users need to search by photo. Such situations most often occur when you need to find out the original source of a particular photograph.
For example, if a person has a frame from a film, but he does not know the title, then from this frame you can find out what kind of film it is. In this case, it is simply impossible to enter a request in words, since it is not clear what needs to be entered.
Besides, sometimes you want to know who took a photo. For such cases, there are very easy-to-use services. Let's look at the most popular ones and how to use them. Before doing this, it would be useful to understand how image search works in general.
Image search algorithm
Everything in this case is based on the fact that when any image is uploaded to the Internet, the process of adding certain attributes to this photo occurs. Any content manager or SEO optimization specialist will understand what the Alt, Title and Description attribute are.
So, any image that is in the open has all this worldwide network. If these attributes are not specified by the person who uploaded the picture, they are generated automatically. Actually, they are used to search for images on the Internet.
Everything is taken into account - the title, the description, and in general all the information that is available for a given image. Now let's return to the description of search services.
Service No. 1. Google Images
Yes, the world's largest search engine, of course, also includes a service for searching information from photographs. The search scheme itself is exactly the same as in a regular search engine that searches using standard test queries.
As practice shows, Google works much better than other search engines in this regard. Actually, this is the reason for its enormous popularity.
Google's photo search service also performs very well - all possible links to the entered pictures and information about them are found.
To find some information about a photo in Google Images, you need to do the following:
Go to www.google.com/imghp. This is the address of Google's image search engine.
Enter the desired image into it.
You can do this in one of four ways:
Copy from another resource on the Internet or from an image viewer. This is done by pressing right button mouse on the desired image, if this happens in the browser, and selecting the “Copy ...” item or selecting the image, for example, in Paint and pressing the Ctrl + C key combination. Then all you have to do is press Ctrl+V on the search engine page.

No. 1. Copy Image button in browser
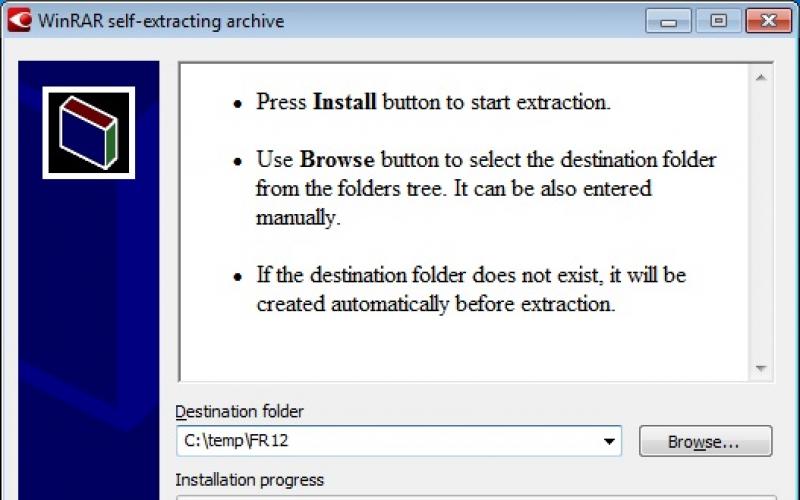
Select a file on your computer. To do this, click on the “Search by picture” button, go to the “Upload file” tab, click on the “Select file” button, in the window that opens, select where the desired picture is located and start the search.

No. 2. Search by uploaded photo in Google Images
Provide a link to the photo. To do this, right-click on the photo you like in your browser and select “Copy address...”. After this, you should go to Google Images, click on the “Search by image” button, click on the “Specify link” tab, enter the previously copied link in the appropriate field and click on the “Search by image” button.

No. 3. Search by image link in Google Images
Just drag the image file from a folder on your computer to any area of the site Google Images. This method is described on the service itself and is the main one for working with it. In addition, it is the simplest among all on this list.
3. Press the Enter button on the keyboard if the search has not yet started automatically.
As a result, the user will see the size of the image, information about whether there are the same pictures on the Internet, only of a different size, and links to sites where the same or similar photographs are available. The user will also see a query that most likely can be used to find this picture. In addition, in the “Similar Images” section, pictures that are similar in meaning will be shown. An example of search results can be seen in Figure 4.

No. 4. Example of search results in Google Images
The Yandex.Images address is yandex.ua/images/. Methods for entering image search by image using of this service exactly the same as Google, specifically:
dragging a picture from a folder;
selecting a file by clicking the “Select file” button;
entering the image address on the Internet.
As soon as the user gets to the site, he will see a menu in front of him, indicated by number 1 in Figure No. 5. To access the above three methods on home page site, you need to click on the “Search by image” button (in Figure No. 5 it is highlighted with a green frame).
After this, a menu indicated by the number 2 will appear. To use the first method, you just need to drag the desired file into the field highlighted with a red frame in the same figure. There is also the inscription “Select a file”, by clicking on which a standard selection dialog will appear, where you will need to indicate the location of the desired image.
To enter an address, you need to copy it on another site (this is done, as before, by right-clicking on the picture and selecting “Save address...”) and enter it in the field shown in the blue frame.

No. 5. Methods for uploading an image to Yandex.Images
Yandex.Images has many advantages over a similar service from Google. So, you can search for a picture from your collection called “My Pictures”.
You can upload anything there. To do this, click on the button highlighted in Figure 6 with a green frame. You can also select search protection here. The fact is that in addition to the necessary materials, the search engine can often return materials of an erotic or violent nature.
It is better not to see all this for children and generally mentally healthy people. For such cases, there is a “Family Search” function, which can be selected by clicking on the protection button (highlighted in a blue frame). There you can also remove protection altogether or choose something in between – “Moderate search”.

No. 6. Yandex.Images page
Here, the screensaver always features a photo of the day, which may also be of interest to the average user. In addition, there are buttons below, by clicking on which you can find other pictures with a similar theme and download desktop wallpaper with this photo.
An example of image search results in this service is shown in Figure 7.

No. 7. Search result via Yandex.Images
Service No. 3. TinYe
This service is the most popular for photo searches among developers and system administrators. The reason for this is that it is best at finding similar pictures and information about the entered image.
After all, Google and Yandex specialize in searching by text phrases, and their algorithm for searching by photo is somewhat less developed. But TinYe was initially positioned as a search engine for photos.
The website of this service looks like this: tineye.com. Its interface is somewhat unusual, but the methods for loading the original image for search remain exactly the same.
So, to select a file to search, you need to click on the button highlighted in Figure 8 with a red frame. After this, all that remains is to again indicate where the image is located.
In the field shown in the same figure with a green frame, you can enter the address of the picture, copying it in advance, or drag the picture directly into it. After this, you just have to click on the search button in the form of a magnifying glass if it does not start automatically.

No. 8. TinYe photo search service page
In the search results, the user will be able to see the number of sites that have an exact match of this image. Below you will see how many pictures were checked and how long this process took.
After this, the sites themselves with the desired image, as well as links to them, will be shown. An example of search results can be seen in Figure 9.

No. 9. Search results on tineye.com
Below you can clearly see how a photo search occurs using a service from Google.