The good old familiar way of working with a computer is to run the required program on it and perform the required work with it. But now this approach is being replaced by another - launch a service or application on the Internet, and not locally on your computer.
This is work using the so-called “web interface”, which is becoming increasingly widespread. The time is not far off when working with a web interface will be more common than local work on a computer, which is still familiar to many.
Have you come across such expressions as “ web interface mail" or "login via web interface"? Many users have a question: what is a web interface? And is it possible to “taste it for the teeth”? to the common man?
A web interface is the user's interaction with the website he needs through a browser.
In particular, the web-interface of e-mail is presented in the form of a regular website (Google, Mail ru, etc.), which provides the user with the opportunity to work with the mailbox.
Of course, such interaction requires that the user’s device (computer, tablet, smartphone) be connected to the Internet.
To log in via the web interface, you need
- open browser,
- find and open the desired site in the browser,
- Enter your data (username and password) on this site to gain access to services and features on the site. That's all.
Let's look at specific examples. As you know, with them everything is always simpler and clearer.
Web mail interface
Let's start with mail, because everyone has e-mail, and everyone checks their inbox periodically.
You can access your mailbox in two ways:
- via the web interface,
- using a special program called mail client(for example, Mozilla Thunderbird, The Bat! and Microsoft Outlook).
Beginner users usually use the first method.

Rice. 1 Log in to Yandex.mail via the web interface
To log into the mail web interface:
- open any browser,
- go to the mail website (for example, go to Yandex, or Mail.ru, Google, Rambler, Yahoo),
- In a special form, enter your data (numbers 1 and 2 in Fig. 1) to access your mail. Click “Login” (either of the two numbers 3 in Fig. 1).
This special form usually has buttons
- “Registration” (or “Create a mailbox” - number 4 in Fig. 1) and
- "Log in."
Click the “Registration” button only if you need to create new mail. If you already have mail, and a new mailbox is not required, then after entering your login and password, click on the “Login” button.
After this, the main Web page will load in the browser window. mailbox. It will contain links to additional web pages that are intended for viewing incoming mail (number 1 in Fig. 2), for making mailbox settings (number 2 in Fig. 2) and others.

Rice. 2 View of the mailbox on Mail ru after logging in via the web interface
Web interface in Clouds
There is a cloud Yandex.Disk, which I wrote about. You can work with it through a web interface or, in other words, online, when connected to the Internet.
The second way to work with Yandex.Disk is to use a special application, in other words, special program. To do this, you need to download and install the application on your computer.
Not everyone likes to install without special need additional programs Moreover, users have limited space on their hard drive. For these reasons, many people use Yandex.Disk via the web interface. However, with this approach, “heavy” files cannot be uploaded to Yandex.Disk. But any question has its pros and cons.
Everything written above can be fully attributed to the web interface.

Rice. 3 Go to the Mail ru Cloud via the web interface
The Cloud also has an application that you can install on your computer. And you can work with the Cloud through the web interface. To do this, open the Cloud website in the browser (number 1 in Fig. 3), and then, on your first visit, click on the “Registration” button. If you already have a login and password for Mail.ru, then click on the “Login” button (number 2 in Fig. 3).
How to access the modem web interface

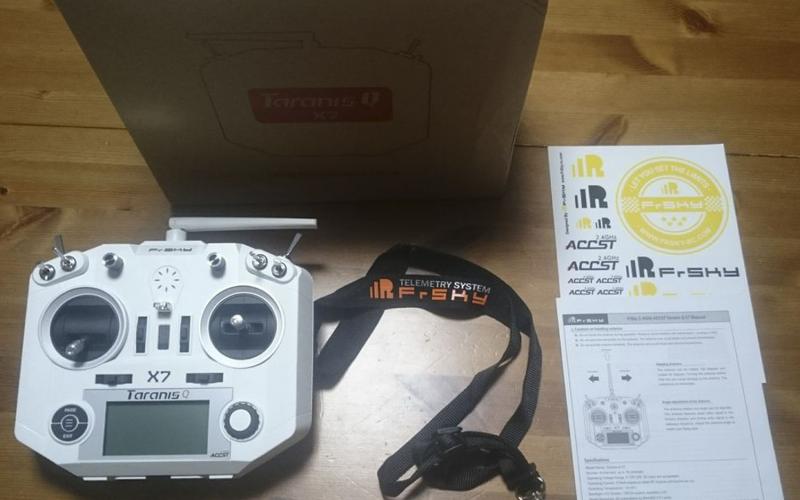
Rice. 4 Examples of Yota modem and Megafon modem
We will talk about modems similar to those shown in Figure 4. These are modems from Yota, Megafon, Beeline, MTS, etc. We do not consider others here.
To access the modem’s web interface, follow the same 3 steps:
- open any browser,
- we will find a site that provides us with a modem (Yota, Megafon, Beeline, MTS),
- We will enter your data for authorization on the site (login and password). Usually they are entered in the user’s “Personal Account” on the website.
Let's say I have a Yota modem. In this case, the web interface of the modem is mine personal account on the Yota website (Fig. 5).
- Click on the “Private Clients” tab (number 1 in Fig. 5),
- and then click on the “Profile” link (number 2 in Fig. 5).
- Enter your login and password,
after which you can control your modem. This includes payment, selection and adjustment of the speed and duration of operation of the Yota modem, etc.

Rice. 5 Login through the web interface of the Yota modem
If you have a Megafon modem, then you should go to the Megafon website. And there, when you first log in, you need to register, and at all subsequent logins, enter your login and password from your personal account on the Megafon website. For more information about Megafon’s personal account, see.
Router web interface
The web interface is also used to manage various network devices, for example, to manage routers. A router is a device designed to “multiply” the Internet, for example, within an apartment or office. When connecting it for the first time, you need to enter special settings, which are convenient to do using the web interface.
This is not done so simply that it can be described in one or two phrases. Therefore, I invite the interested reader to look at the article “How my provider forced me to reconfigure my D-Link router,” where this is described in more detail. To do this, click on THIS link.
It is difficult to convey in words the feeling of success that comes after successfully setting up such a device, when everything ends well, and the Internet is “distributed” to computers.
.Already more 3,000 subscribers.
Now, probably, even schoolchildren know that a router is a mini-computer and must be configured before using it. But with all this, not everyone knows how to go into the router settings. But really, how?! For beginners and housewives, this is completely “Chinese writing”, on a par with the inscriptions on the Egyptian pyramids! We will help you figure it all out! At least logging into the router won’t seem like such an abstruse activity for computer geeks. So, let's go!
The web interface of the router and what it is used for
All settings of a modern Wi-Fi router are collected in one graphical interface, which is called the web interface or web configurator. Many users also call it “router website” or “router personal account.”

Although this is wrong, it is not without logic. The fact is that in order to go into the router settings, you need to use a regular web browser with which you surf the Internet - Chrome, Opera, Explorer or Firefox. So it turns out that you need to go to the router’s website to configure it, and the sequence of actions in order to enter the router settings is as simple as 5 kopecks.
192.168.0.1 or 192.168.1.1 - which address to use?!
So, great, we already realized that all this is easy and simple, but we haven’t yet figured out how to log into the router’s web interface. To do this, you need to know its IP address. How to recognize him?! Again, nothing complicated! Let's take this infernal piece of iron in our hands and turn it over! On the back there should be a sticker with a bunch of letters and numbers. Here is both the model and serial number and a bunch of other similar nonsense. Among all this riot of information, we need to find the device’s IP address. This is what it will look like on the sticker:

Typically, an IP address of either or is used to access the router settings. Less common are addresses 192.168.100.1, 192.168.8.1, 10.0.0.1 or some other. The username and password for logging in are usually indicated next to it. In the example in the picture this is the login admin and password admin.
Many modern network devices use a text, domain address instead of IP. Example - tplinkwifi.net TP-Link routers, my.keenetic.net from Zyxel Keenetic, router.asus.com for ASUS routers.

There is no need to be scared - everything is the same, but in a slightly different form. Everything is used the same way - launch a web browser (Chrome, Opera, Firefox, IE, etc.) and enter either the IP address of the Wi-Fi router or its URL in the address bar. That's it!
Why can't I access my router settings?
As my experience tells me, very often problems with access to the web interface begin at the very first stage. And it seems like you’re doing everything correctly, the device is working, the lights are blinking, but for some reason you can’t enter the router settings. Not at all, from the word “at all.” What to do and how to be?! Let's find out!
1. The router’s website does not open
You enter the IP address of the router in the browser, and in response you receive the error “Page not found” or “Cannot access the site.”

There are several reasons for this. The most common one is simply device operation glitch- try rebooting it and checking the router settings again.
The second most popular reason is banal errors in writing the router address. Register it in address bar it should be exactly as it is written on the sticker. That is, 192.168.1.1 or 192.168.0.1. Users, as a rule, begin to be completely stupid, inventing something of their own. For example, they replace numbers with letters - like this: 192.168.l.l or 192.168.o.l - of course it won’t work like that! The IP address must consist of numbers, but the system will misunderstand letters! Sometimes they manage to forget about the dots in the address - 19216811, or add more parts - 192.168.0.1.1 - this will not work either.
Quite common problems with settings network card on a computer or laptop. The solution is also quite simple. Press the keys Win And R to open the Run window. Enter the open command in the line ncpa.cpl and press the “Enter” key, after which we will see a list of network Windows connections. Click on the one to which the router is connected, right click mouse and select “Properties”:

Then, as shown in the figure, double-click on the line “Internet Protocol version 4 (TCP/IPv4)” to open the third window - network connection properties. There we check the boxes to automatically obtain an IP address and DNS servers. This should be done in most cases, since the DHCP server should be enabled on the router by default and it distributes the IP, which means the computer should pick it up automatically!
If this does not help, try registering the IP on the network card statically. Like this:

This is in case the DHCP server on the network device is turned off or not working properly. If you suddenly receive the error “IP address conflict on the network,” enter a different address - 192.168.1.3, 192.168.1.4, etc.
If none of the advice I listed above helped, try this. Launch the command line and write the command in it:
Ping
That is, if the router has an address of 192.168.0.1, then the command will look like this:
Ping 192.168.0.1 -t
Press the “Enter” key to launch the Ping command. Thanks to the “-t” switch, packets will be sent continuously, and not in 4 requests, as is done by default. Next, you will need to try one by one connecting the patch cord coming from the computer to all ports of the router one by one.

The trick here is that modern routers can reassign LAN ports for different purposes - IPTV, SIP telephony, etc. You will not be able to access the router settings through such a port. That's why it's worth checking the other ports. As a rule, if the device is “live”, then it will respond on one of the ports.
2. The factory default password admin admin is not suitable
This is the most interesting situation. It usually occurs either among absent-minded people who forget everything, or among those who did not set up their own router or modem, leaving it in the hands of a third-party configurer or simply entrusting this process to friends, acquaintances, etc.

And the result in both cases is sad - it is not possible to enter the router settings using the default factory password and a login or password error is displayed. What to do? Unfortunately, in 999 cases out of a thousand, there is only one solution - reset the router settings. To do this, it has a special “Reset” button, which can be found on the back of the case, next to the connectors. It looks like this:

Resetting the router settings is usually quite simple - click “Reset” and hold it for 8-10 seconds. In this case, it is better to look at the front panel indicators. When they all light up at once or, on the contrary, go out, you need to release the button and wait for the device to boot normally. But ATTENTION!!!- after resetting the settings, your router will again look as if it had just been taken out of the box and unpacked. That is, for normal operation it will be necessary to configure it again. But the factory login admin and password admin will work again!
Quite often, when submitting new material on the pages of a site about connecting a particular digital device to a home network, some readers have a question: how to go into the router settings? It would seem that there is nothing complicated in the procedure for logging into the administrative panel of a network device and nothing can be a stumbling block here. However, this question is asked with periodic precision, which indicates that it is open to a certain part of the site's audience. Friends! Regardless of the manufacturer of the network device, finding out the IP address and logging into the router settings is quite simple.
In short, it consists of combining network segments and sending data packets between them based on a special table according to specified administrator rules. That is, in our case, these are low-port network devices that connect home network with an Internet provider channel (methods for connecting to the provider are described), and home users act as administrators. You can enter the router settings via either a LAN or a Wi-Fi connection.
Configuring the computer's network card.
How to determine the router's IP address in Windows 7.
If for some reason you do not have the attached document and do not have the necessary information on the sticker, then you can find out the login information for the control panel through network connections. For example, for operating system Windows 7 can view the IP address of a network device using the following path:
Windows 7 - Start > Control Panel > Network and Internet > Network and Sharing Center shared access» > “Changing adapter settings” > double-click on the “Connect via local network" and in the window that opens, click on the "Information..." button. In a new window, the “DNS server” line will display the IP address of the connected router.


In addition, you can determine the router’s IP via the command line. To do this, press the combination on the keyboard Windows keys+R (free references for keyboard shortcuts) and in the Run window that opens, enter the command CMD (command line), click OK.


Actually, after this, the command line will open, where you need to enter the ipconfig command. Like this:


Now you have access to information about network connections on your local network. Find the line “Default gateway”, it displays the IP address of the router. For me it is 192.168.1.1. That's it. All that remains is to paste the received address into the browser line, pass authentication, and configure the wireless network.
Unable to open your router settings page?
It may happen that while accessing the control panel, the browser notifies you with the message: “The page cannot be opened.” Then it makes sense to return to “Local Area Connections” and right-click on your network connection and select “Status”.
Here you need to click on the “Information” button and in the window that opens “Information about network connection"Look at the line "Default gateway IP...". If it looks like 192.168.0.1; 192.168.1.1 or similar, which means the DHCP server on the router is enabled and configured (IP for logging into the network device).
At the same time, the line “IPv4 Address” may contain an IP of this type 169.254.xx.xx (usually assigned by default if DHCP is not detected), then you need to specify a static IP in the “Internet Protocol Version 4 (TCP/IPv4)” settings.


Similar problems in the operation of a DHCP client on a computer may be due to firewalls... However, there are other reasons. In general, you need to register an IP for a computer that falls within the range of IP address pools issued by the DHCP server on the router. Usually, by default, for TP-LINK routers it is set in the range 192.168.1.100 - 192.168.1.199, and for ASUS 192.168.1.2 - 192.168.1.254.
In the case of TP-LINK it looks like this:
- IP - 192.168.1.101
- Subnet mask - 255.255.255.0
- Default gateway - 192.168.1.1
- DNS – 192.168.1.1
In the case of ASUS like this:
- IP - 192.168.1.7
- Subnet mask - 255.255.255.0
- Default gateway - 192.168.1.1
- DNS – 192.168.1.1
Write it down, click “OK” and try logging into the admin panel again. I think the principle of assigning a static IP to a computer is clear to you. Experiment. This phenomenon, of course, is extremely rare, but it is better for you to know about it. I want to log into the router interface without any problems.
Nowadays, when communicating on forums and in specialized chats, you can often hear the word web interface.
For example, the most commonly used options are: the web interface of a router, modem, website, mail or cloud storage. But not everyone can confidently answer what it is. But everything is not so complicated and abstruse.
You and I know very well what a program is, and even a beginner will more or less clearly say that it is a specific program executed on a specific computer to obtain a specific result. So now progress has reached the point that many programs, applications and even games are run not on your PC, but on a remote server. To see the result, you need to connect to the server. this can be done using a client program or an online service. It is precisely in order for a person to be able to use the online service that the Web Interface is used. People often call it “Personal Account”, which is not always correct.
As you may have noticed, the name itself consists of two words. The word “Web” implies that it is either an element of the global Internet, or it works using a special web server on a local network. The word Interface means a human-friendly environment, shell or, in simple words, appearance of the service - windows, buttons, fields, text or graphic information. Let's look at the most common examples in more detail.
Web interface of a router or modem
Each managed network device is actually an independent computer and it has its own operating system. True, not as multifunctional as Windows, but highly specialized, designed to connect to the provider’s network and distribute the Internet to connected clients. In the beginning, command line and Telnet protocol were used to control it. But then, as the equipment developed, in order to make it easier for the user to manage it, a separate server was made on the router or modem, which, in turn, runs a user-friendly web command shell. This is what logging into the Wi-Fi router web interface looks like:
And this is the status page of the router or modem:
There will also be a main menu from which you have access to setting up any device option.
Today, any modern managed network device has its own web management interface. A striking example of this is video cameras, switches, modems and routers from D-Link, Asus, Zyxel, TP-Link, etc.
Web email interface
Today, email is the most popular online service on the Internet, which is even more popular than social networks.
About 15-20 years ago, without a special client program, working with email was not possible. To get away from this anachronism, special shell pages were developed from which you can do everything the same as from the client application: send and receive letters, process them, sort and redirect them. First, the largest services such as Mail.ru, Yandex and GMail switched to this, and then even small corporate servers. This is what, for example, the online shell of one of the most popular email clients in Russia looks like:
It is called the “mail web interface”. There are folders for incoming, outgoing, junk and deleted mail. From here you can send and receive letters.
Login to the web mail interface is locked with the password you specified when registering your mailbox.
Cloud web interface
Over the past few years, the global web has been actively developing cloud storage data, or, more simply put, clouds. Upon registration, everyone receives a certain piece of space there for free and stores information there different types: programs, documents, videos, photos or music. It can be accessed from anywhere in the world, provided there is Internet access. If the free volume provided is not enough, you can purchase more. This is very convenient and therefore clouds are becoming more and more popular. To work with information, each user has a personal account with the necessary set of tools for manipulating files - creating, viewing, editing, copying and deleting. This is the cloud web interface. Here is a clear example - [email protected]:
Also popular in Russia are Google Drive, Yandex Disk, DropBox.
Web hosting interface
This type of command shell is more familiar to webmasters and all those who work with websites - creating, administering, promoting, etc.
Each website on the Internet runs on a special www-server, which, in turn, runs on a specialized computer platform - hosting, developed and configured for hosting websites. This platform is managed through a special web interface, which is also called the Hosting Panel. Here is an example of such a system - the DirectAdmin web interface:
Shells such as CPanel, Plesk and ISPmanager are also popular among hosters. Some large companies are developing their own separate software package for these purposes.
Using such a web interface, you can manage the operation of the server, monitor its status, view logs and save backup copies.
On computer forums, a lot of attention is paid to fine-tuning the router, which can significantly increase its speed and connection stability. However, many users are faced with a problem of a different order - they simply cannot go into the settings of their router to select the optimal parameters. There is no need to panic and go to the store for a new device, since anyone can solve such a problem. If the computer does not enter the standard menu of the router’s web client, you need to try changing the connection parameters or pay attention to other nuances.
We are looking for a way out if there is no access to the router settings.
By typing the web client address 192.168.1.1 in your favorite browser, you may encounter that the router does not respond to your command. To enter the web client menu, first take the instructions and read what address is set for the router by the manufacturer. Many electronics developers prefer to set the combination 192.168.0.1, which allows you to free up the above address for other network equipment. Also, information about the base address may be contained on the bottom of the device.
Try changing your web browser - the best option is standard application Internet Explorer, which uses direct connections without redirection. However, it may also display an error when trying to enter 192.168.1.1. You can increase the chances of a successful connection by using the RJ-45 cable that comes with your router. Be careful - it needs to be connected to the LAN port on the router, and not the WAN connector, which is most often highlighted in blue. To get unlimited access to menu 192.168.0.1, be sure to disable the wireless adapter you are using on your computer using the special function button or the network connections menu.
Fine tuning
If the computer does not enter the standard web client menu, it is quite possible that the connection error with 192.168.1.1 is caused by an address conflict on the network. First of all, you will need to go into the control panel of your operating system and find the “Internet Options” item there, which can also be called “Internet Options”. Then you need to open the “Connection” tab and find the button at the bottom that is responsible for the local network parameters. In the dialog box that opens after clicking it, disable the use of proxies in regular local networks and VPNs.
However, it is not always possible to establish a connection with 192.168.0.1. You need to open the properties of the network adapter you are using - you can enter this menu in three main ways:
- Through the “Network Control Center”;
- Through the control panel - the “Network Connections” tool;
- Enter in command line control netconnections.

Since the router has a web client address 192.168.1.1 or an alternative 192.168.0.1, for the network to work correctly, the electronic computer must have a similar IP, differing only in the last digit. By right-clicking on the icon of the adapter you need, open its properties, in the dialog box that appears, select the IPv4 connection protocol and click on the “Properties” button again.
The general protocol parameters may contain the answer to why the computer does not enter the standard menu of the router’s web client. The IP may be different from the one the router uses - to continue working you will need to change it, using the same beginning as 192.168.1.1 or 192.168.0.1. The number at the end should vary from 2 to 254 so as not to create an address conflict within the local network. Of course, the best option would be to set the address automatically based on the needs of the computer, but this feature is not supported by every network. Don’t forget to also set the gateway and DNS server address on this tab - in these fields you will need to enter the numbers 192.168.0.1 or an alternative combination 192.168.1.1, depending on the standard parameters of the router.

Also, the computer sometimes does not enter the menu you require as a result of restrictions on transmitted traffic within the created local network. It may be prevented from opening menu 192.168.1.1 by the antivirus you have installed, which establishes too much control over the user’s actions - you should simply disable it while working with the device settings. Access by specified address or 192.168.0.1 is often blocked by the standard operating system firewall - it can also be disabled through the operating system control panel. After completing the above steps, you should be able to go into the settings of the router you are using, however, in certain situations, all user actions are ineffective.
Extreme measures
If the computer still does not log into the device’s web client, it is advisable to completely reboot it - for this, use a small Reset button, which can be located at the back or at the bottom of the router case. It must be pressed with a long thin object (for example, a paper clip) and held for approximately 10–20 seconds, depending on the model of the wireless device. After full reset data, you can access all advanced device settings using the standard menu address 192.168.0.1, as well as the alternative combination 192.168.1.1 - this is determined by the device model.

This method will also be effective if you have irretrievably lost your data for accessing the web client or it has been changed by another person who has gained unauthorized access to the router settings menu. After the reboot, you must use the standard login and preset password, which is set by the equipment builder. Most often you need to enter the word “admin” in both lines, but there are some exceptions. To accurately determine the correct login information for a standard web client, review the instructions for the device. Be careful, because after rebooting all settings will have to be set again.
If, after resetting the router, the computer does not enter the settings menu at menu address 192.168.0.1 or an alternative IP, try again using another laptop or modern tablet. It is quite possible that the inability to gain access to 192.168.1.1 is caused by incorrect configuration of the network card or its damage. In the first case, you should try to restore the drivers or use a proprietary operating system distribution from the developer of the smart machine. In the second case, you will have to change the wireless module.
The source of your problems may also be a malfunction of the router itself - usually the problem of inability to access 192.168.1.1 can be solved by simply flashing it wireless device. Remember that you can enter the web client menu without interference only if you download the software from a trusted source - it is best to use a global network resource or the file server of the router manufacturer itself. Also, the router does not enter the standard settings menu for the combination 192.168.0.1 and if the components are completely damaged. It is always easier and cheaper to replace such a device than to repair it. When choosing a new device, be guided by the characteristics of its power and antenna gain, as well as the ability to work with certain types of networks.

If the device is damaged, but you need to create a wireless network for a short time, you can use the corresponding adapter function on your computer. To do this, you should install the appropriate software - good option there will be a Virtual Router Manager. After launching it and correct settings the electronic computer will independently distribute traffic via a wireless network, although the capabilities of such a connection will be limited. For example, it will definitely not be possible to achieve high speed and long range of network operation. Additionally, your device will not be able to connect to other wireless networks during this time.
Problem Solving
Statistics provided by service centers show that in 90% of cases the problem with the inability to access the web client can be solved by simply reconfiguring the router or computer. The user should pay special attention to the network parameters - most often the cause of the malfunction is an address conflict in the computer’s environment. Also, the inability to access is often due to traffic restriction by an antivirus or standard firewall, so it is advisable to disable such security applications before working with the settings wireless network. However, there are also troubles associated with failure software router - the device will need to be rebooted or re-flashed. Finally, the root of the problem should be looked for in the malfunction of the device itself or the computer’s network adapter - unfortunately, if they break down, you will have to purchase new equipment.