Thanks to the availability of special web services and applications, you can easily find a person by photo.
Most modern programs and websites use artificial intelligence technology.
It allows you to increase the accuracy of facial recognition in a photo as the number of program users increases.
It should be understood that no search engine can give a 100% guarantee of finding an image. Often errors occur when reading pixels, or the browser searches for photos that are similar in meaning and color palette.
Below are some of the most effective ways. If one of them does not help you, feel free to move on to the other.
Ultimately, one of the methods will turn out to be the most suitable for your picture and the person will be found. We also recommend that you carry it out using several photographs at once, if you have them.
ServiceGoogle
The first and easiest way to search by image is the well-known Google. The developers of the popular system have introduced a function for working with user images.
Now you can not only enter a query, but also insert individual images into the text field. The search engine carries out analysis for all sites and social networks that are indexed in the system.
Let's look at simple example how to use the function:
- Let's go to the website. This page differs from the standard one by the presence of an additional button for adding;
- To get started, click on the camera icon. A window for selecting the type of photo upload will appear. The user can provide a direct link to an image already posted on the Internet or download graphics from the computer’s memory;
- Click on the “Search by image” button.
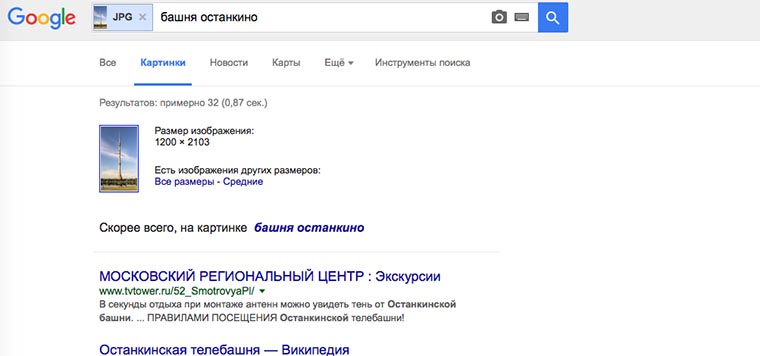
The result of processing your request in Google will look like this:
It will automatically indicate the person's name or subject. Also, the user will be able to view similar images. Another element of search results are pages that mention the person found.
Often, the result only shows similar images without providing a name. This means that there are too many similar pictures on the Internet and the system cannot find a 100% exact match. Try scrolling down to the "Pages with matching images" box. This way you can view a list of links that contain what you are looking for.
With it you can search not only for people, but also for various objects. As practice shows, a search engine can be very useful when you need to find out the name of an unknown item or find things you like.
Yandex
Photo search from Yandex is another popular service that searches for graphic content across all sites. At first glance, it is practically no different from Google, except for the interface and design. However, Yandex developers claim that their system uses a modified algorithm using computer vision.
This way, by using both systems, you can have a better chance of finding the one you're looking for. To start the analysis, go to the main site. Find the text line and next to it click on the “Pictures” tab to go to the corresponding section:
- In the tab that opens, click on the camera icon;
- Now in the tab that opens, click on the button to load a photo from your PC memory or provide a direct link to the picture on the Internet. Click on “Find”;
The result will be a set of the most similar images with which you can find a person. Also, you can select different picture sizes and continue the analysis with a better quality photo. Be sure to look at the list of mentions on other sites to increase your chances of discovering the person.
Analysis by photo inVK
In addition to standard systems, there are a lot of services for monitoring by photo only in specific social networks. Since 95% of Runet users have a profile on VKontakte, it is better to search for it using special resources that work only with this social network. This way, you will reduce the analysis time and the number of similar pictures.
To start monitoring photos in VK, you need to install an extension for Chrome browser. The app is called "StopFake". Go to the software store and enter the name of the extension. Then click on the install key and wait for the button to appear in the upper right corner.
Although the program is designed to quickly identify fake accounts, it can also be used to find people. You will need to upload a photo to your album on VKontakte, since this can only be done using the one that is in the site’s database.
- Open the photo in your VK album. The album can be private, the main thing is that it is on the website;
- After opening the image, press the button to launch the StopFake extension. It is located in the upper right corner of the browser toolbar. To eliminate possible errors in the operation of the utility, we recommend restarting the browser immediately after installing the extension;
- It will automatically identify them on the social network that contains the photo you are looking for. Thanks to the author's signature, you can easily find the person you need. Click on the author's name to go to it.
The search giant's new development has already surpassed humans.
Most of you know about Google's photo search feature. Just go to Pictures mode, add a link to a photo or upload a file from your computer, and the search engine will identify the object located in the frame.

However, this trick only works with popular attractions and famous places. Google can easily recognize the Eiffel Tower, the Statue of Liberty or the Egyptian pyramids. However, if you simply upload a photo of a street in your city, the search will not be successful.
Experts at Google are not sitting still and developing a neural network PlaNet, which will allow you to search for an area using photos more accurately. For analysis and search this system divided most of the land into 26,000 zones. Each of them is characterized certain features and different from others. 
More than 120 million images with added geo-tags were used to train PlaNet. Later, to test the system, she was asked to recognize the location of 2 million photos from Flickr. The neural network was able to determine the position 3,6%
street-accurate images, 10%
- accurate to the city. The country was set to 28,4%
cases, and the continent - in 48%
.
PlaNet notices something in the photo that not every person will notice. The system recognizes dishes, plants, direction of movement on the road, animals, architecture of buildings and other features. After analysis, the search engine makes its guess about the shooting location.
PlaNet's results were compared with those of expert travelers in GeoGuessr. This game uses Google Street View street photos and requires you to guess the location where the photo was taken.
The neural network performed better than a team of experts. The average PlaNet error result was 1131.7 km, travelers were wrong by an average of 2320.75 km.
I wonder if PlaNet will be able to guess the location of a photo based on the carpet in the background.


There are times when you really need to search by image from your phone. Yes, most of us know how to perform such an operation on a computer.
Everything is simple there - each browser (, Google, and so on) has its own page for using photos as a request.
Actually, all that remains is indicate the original photo and start looking for relevant materials.
Contrary to the opinion of some users, this operation is no less easy.
The algorithm of actions is the same, and in some cases even simpler. You just need to know what services or applications to use for this and how to do it correctly.
But we will tell you 5 best options, which help you find something from a photograph.
Contents:
Google Chrome
This is the same browser that is available by default on all smartphones and tablets running .
By the way, Yandex has its own browser, just like Google, but it does not have the same window and functions as shown in the figure. Therefore, there is no point in downloading it.
TinEye
And this is a specialized service created to enable users from all over the world to search for information using photos.
Many professionals know him.
Although it is also known among amateurs, since it is extremely easy to accomplish the task at hand, and the results it produces are quite informative and accurate.
To use it, do this:
- Visit the official website (link below). The resource page automatically adapts to your device, which is quite important.
- And then everything is very clear - there is a single button and field for entering a request. If you click on the button, a new window will appear in which you should specify the location of the source file. And the input field is intended for using links to photos. If the second approach is used, that is, a link is entered, you will need to additionally click on the icon in the form of a magnifying glass.
- After this the process will take place.

It is noteworthy that TinEye’s algorithm is completely different from that used by Yandex and Google.
In most cases, the results are more accurate and more consistent with user expectations. So you should definitely try using this service.
Google Googles
Here we are talking about a rather non-standard application that searches for information not just about some pictures, but about the places where you are and the things that you see.
This means that you can take a photo of the painting you are looking at in a gallery, or the food you see in a store.
After this, the program will find all available information on the photographed item.
It is also worth noting that the program has a translation mode with accompanying text recognition in the photo.
That is, you can take a picture of some inscription so that the program can use this inscription as a request and translate it, for example, from Russian into English.
To use Googles on your smartphone, do this:
- launch the application (before that, of course, download and install it);
- select the operating mode below;
- take a photo in the same way as you usually do;
- look at the results.

CamFind
And our list closes with another application that works on the same principle as Google Googles, but mainly searches for all kinds of goods in stores.
For example, you can take a photo of some sunglasses or a jar of kefir and the application will immediately find all the information on this product.
If these are glasses, then you will see prices in different retail chains for them, varieties, brands, and so on.
In general, for those who are constantly shopping or just regularly buy something in stores.
On the other hand, it will be useful, for example, to parents who want to know the composition of the product they buy for their children. In general, this is a really good and useful thing.
Using this program is also very simple and consists of the following:
- take a photo;
- wait until identification occurs;
- look at the results.
It is noteworthy that here you can transfer some images to your own special collection (section “Favorites”).

Modern smartphones insert GPS coordinates into all photos by default, as do many modern cameras.
Next, anyone can easily access the geographic information that is contained in the photo, although not visible in it. It may be better to hide such data especially when publishing photos to open access. Information about the shooting location is stored in so-called “metadata”, which is not visible in the photo, but is available in the photo file properties. Similarly, additional (meta) information is written to document files Microsoft Office or PDF.
If the photo was taken with GPS coordinates recorded, then on a Windows PC you need to click on the corresponding file right click mouse and select Properties in context menu. Then select the Details tab and scroll down the options page to Latitude and Longitude.
On Mac computers Right-click (or Control-click) the photo file, then select Get Info. Latitude and longitude information will be shown.

However, geographic information is not present in all photo files. The author of the photo could cancel the recording of the coordinates on his phone, or clear additional information already in the photo files on the computer. Moreover, many online photo publishing services automatically remove additional information when uploading to protect private (personal) information. Therefore, additional information may be missing completely or partially.
But if you have GPS coordinates saved, you can easily match them to a location on maps - many online mapping services provide this ability, for example, you can simply paste the coordinates into the search field on Google Maps. Instructions for entering coordinates on Google Maps (in Russian):
https://support.google.com/maps/answer/18539?hl=en
Of course, metadata can be edited and should not be used as conclusive evidence, but it is easier to remove it entirely than to change it, so the remaining GPS coordinates in the file usually provide an objective indication of the shooting location.
To prevent the recording of coordinates in a photo file in advance, it is enough to change the state of a certain parameter, but this information is recorded solely for the convenience of users and many online services (Google+ Photos, Flickr from Yahoo! or Apple iCloud) use it to geographically organize a collection of photographs, since this “extra” data can always be deleted by means of the operating system or special programs(eg EXIF Viewer). On iPhones, open Settings, tap Privacy, then Location Services. Select Camera from the list and select Never for Allow Location Access. After this, the coordinates will not be saved in photos and you will be able to hide your location when taking photos.
A similar operation in Android systems depends on the firmware of the manufacturer, and applications for operating and setting the camera differ not only for different smartphone models, but also for versions of the camera itself operating system. In either case, there must be a setting to allow or disable the recording of geographic metadata.

But knowing how it was created, where, when and who did it is sometimes more important. Any document (not just photos) created using mobile device or a computer, contains a piece of hidden information.
Very often, when uploading photos to social networks (Instagram, Vkontakte, Facebook, Twitter, Odnoklassniki, etc.), people do not understand that they are giving the social network they are using. networks: camera type, phone model, name, location and other data about yourself and your device. The article will be of interest to you if you want to know where the photo was taken and if you don’t yet know what metadata is, how it works, how to view, change and delete it.
What is photo metadata?
Let's consider the concept " metadata"using a very simple and everyday example. Digital photography (what we see and analyze from the outside) is a kind of cake that a loving mother baked and put on the table - we see it, but we don’t know what’s inside. Metadata - information about how and where the photo was taken, the name of the city or attraction, time, date, device, i.e. in other words - a cross-section of the pie, when we can already tell about the structure, color, what ingredients are inside, in what form, quantity, volume, what taste it has, etc.
Digital Photo Metadata- invisible information about properties and characteristics created in automatic mode, using a camera or mobile device. In essence, it resembles and, if necessary, changes using a graphic editor or other specialized software. If earlier, in order to determine the location of the shooting and who is depicted on it, people signed photographs on the back side, now there is no need for this, simply because a digital photograph is signed automatically.
Types of Digital Photography Metadata
Any file type (sound, text, image, video) has its own metadata standard. For digital photographs, they mainly use:
- EXIF (Exchangeable Image File Format) - technical information about the details of the shooting taken by the camera;
- IPTC (International Press Telecommunications Council) - photo description and copyright information;
- XMP (eXtensible Metadata Platform) is a standard developed by Adobe that allows you to include any information;
- file properties - parameters are stored and are an integral part of the photo.
Most widespread among metadata has EXIF standard, which is an integral part of digital images and contains a complete description of camera settings, namely:
- software (camera) name and version;
- date and time of shooting;
- data on the digital environment;
- diaphragm;
- geographic coordinates of the location;
- focal length;
- exposure mode;
- white balance;
- brightness value;
- ISO value;
- endurance;
- compression scheme;
- camera orientation (vertical or horizontal);
- matrix size;
- information about the author;
- and much more.
Any parameter listed and not included in this list has a specific category and format. Metadata Key Factor- a clearly organized structure that allows data to be read by both people and technology. This distinction allows you to work with a huge amount of information in a short period of time, and use the resulting metadata to collect, store, search, process and combine automatically.
A good example is, for example, the Google Images and Yandex.Images service. It is enough to add any photo and the search, thanks to metadata, will show identical or similar images by objects, structure, content, color design, etc.
Scope of metadata
In the right hands, metadata can be like a “lifebuoy”, otherwise it can be like “a stone tied to your feet and pulling you to the bottom.” If you have the knowledge and skills, digital photo metadata, files and documents - an incredibly powerful tool. They find their use among intruders, hackers, law enforcement agencies and security specialists. To learn about the dangers of hiding file data and what uses they can be found in, watch the video on YouTube from the blogger “ overbafer1»:
One example where metadata became a fatal mistake for a person is the story of John McAfee, founder and developer of the antivirus software of the same name - McAfee.
At a certain period of time, he was on the run, hiding from the government on charges of murder, despite this, he had many fans and imitators. Thus, journalists from Vice had the honor of spending several days with the fugitive in a secret hideout, after which they published an article about this adventure containing a photograph from an iPhone.
The problem is that they didn't take into account the fact that the iPhone, like many other modern devices, embeds geolocation data into every photo. Once they realized this fact (or most likely someone told them), the photo was deleted and replaced with a new one without being displayed geographical coordinates in EXIF, but it was already too late.
Soon after identification, McAfee was detained in Guatemala on charges of illegal border crossing. Thus, do not underestimate metadata, because with its help you can find both a person and a device that is stolen or lost.
“We started using technology blindly, without understanding the risks. And the risk is a complete loss of confidentiality!”- John McAfee said in an interview.
How can I view metadata and find out where a photo was taken?
You can see and analyze hidden data using file properties, image viewing software, graphic editors and special online services. As an example, take this photo:

Find out the GPS coordinates and metadata of a photo through properties
File properties- a function that allows you to see technical information photographs: name, type, creation date, size, attributes, etc. These parameters are part of the image and almost any changes in this metadata section are only available when the file is modified.
Viewing properties is the most accessible way of obtaining metadata, since it can be implemented, if not on any, then on almost all modern operating systems. For example, let's look at how to do this on Windows 10. There are currently two options available and the first one is:
- Upload or download the photo to your computer.
- Right-click and go to Properties:

- In the window that opens, go to the “Details” tab:

In addition to technical metadata, this window also contains a number of other sections:
- description (description does not need description, because the name speaks for itself);
- source (IPTC);
- image (image dimensions and colors);
- camera (EXIF);
- improved photo ( additional options EXIF);
- GPS (geographic coordinates of the photo);
- file (technical data).
In the GPS section (not displayed on all photos) you can see the coordinates. By uploading them to Google or Yandex maps you can find out where the photo was taken:

The second option for viewing geographic coordinates, just as simple and even more accessible, because the map is loaded immediately and there is no need to perform additional actions (on Windows 10; on others, perhaps, everything is not so rosy):
- Download or upload the photo to your computer.
- Open the image in full screen mode(for example, double-clicking the left mouse button). In the top menu, find settings and go to the “File info” section:

- Now, in addition to the photo, a mixture of metadata, both technical and EXIF, is displayed:

- At the bottom of this window you can see the “Location” section, where the city in which the photo was taken is indicated and a map thumbnail is displayed indicating the coordinate point. If you click on the “Open map” link under the thumbnail, the map will open in full screen mode and you can view the shooting location in more detail:

The identification accuracy is extremely high. The error is about 5-15 meters.
View photo metadata online
There are many ways to monitor on the Internet and, without a doubt, there are online resources that allow you to determine the metadata of a photo and discover its geodata. There are too many of them and each of them is different and stands out in some way. In this article we will look at the most popular and effective ones.
The simplest in functionality and probably the most popular resource for searching metadata. According to the author, photographs and data viewed using this service are not shared with anyone, nor are they retained beyond the time period necessary for the service to function. Supports a very large number of photo formats. To use the search, go to the official website Jeffrey's Image Metadata Viewer from the link above:

Upload an image from your computer or provide a link. Verify that you are not a robot and click the “View Image Data” button. After a few seconds, the photo will be uploaded and a window with basic information will appear:

In this window, in addition to various parameters and characteristics, there are coordinates and links to online maps from Google, Yahoo, WikiMapia, OpenStreetMap, Bing, which makes it easy to find out and see the shooting location. If you scroll down the page, you will see complete information about the photo in the EXIF, File and Composite section.
Forgot where you took a photo using your mobile device or camera? Maybe you just want to know where the photo was taken? Pic2Map analyzes the EXIF metadata embedded in the image to find GPS coordinates and location (if present) and, as a result, displays the photo on a map with a full description of the camera's features and parameters.
The service works very simply - go to home page website using the link above, click the “Select photo files” button. If you do not want the uploaded photo to be publicly available, check the box next to “Keep photos private”:

After the service processes the EXIF data of the photo, you will see a mark on the map with the location and brief information:

A little lower, on the same page, there is a text description of the settings and parameters of the image:

From the description it follows that:
- Photo taken using Meizu M6 Note camera with f/1.9 aperture, 1/158 sec. shutter speed and ISO 101. The flash did not fire, forced flash mode. Source file The image has a resolution of 1000 x 750 pixels, or, in other words, 0.8 megapixels. The image has a resolution of 72 DPI and takes up 0.10 megabytes of disk space.
- According to the image's metadata, the photo was taken on Tuesday, April 23, 2019. Local time was 19:14:18. The time zone is Europe/Zaporozhye, which is GMT +03:00. Please note that the time zone was guessed using GPS coordinates and may not be accurate. The EXIF timestamp may also be different if the date and time on your digital camera are not set correctly.
- The Meizu M6 Note camera has a built-in GPS receiver and allows you to geotag image files. The coordinates and location of the shooting are stored in EXIF metadata. According to the analysis of GPS data, the photo was taken at a point with coordinates 49 58 "57.81" north latitude, 36 12 "58.49" east longitude. The camera was pointing east at 83.00 degrees. Using reverse geocoding, the address associated with the coordinates is determined to be Goncharovsky Bridge, Koneva Street, Novo-Bovarsky District, Kharkov City, Kharkov Region, 61004, Ukraine. Depending on the GPS receiver and reception conditions, accuracy may vary and the address should not be considered an exact location.
In addition to the text description, the service displays information by category in a structured format:

Including, the site contains public albums created by users. They contain pictures of various types with a position marked on the map.
A service that allows you to find out EXIF, IPTC, XMP and other JPEG photo information online. This online tool analyzes a JPEG photo for metadata and displays information such as: photo resolution, brand and model of equipment, DPI size, shutter speed, aperture, ISO value, date and time of shooting, flash used or not, type and focal length lens, including the one used when shooting, the presence of digital zoom, white balance, camera mileage (number of lens shutter releases), serial number camera and lens separately, GPS coordinates and much more.
In order to perform the analysis, go to the official website of the resource using the link above and upload a photo:

After a few seconds, you will receive the processing result, which contains technical, EXIF and calculated metadata:
Programs for viewing photo metadata
On the Internet, in addition to online services for viewing metadata, there are many desktop software for various platforms. To a large extent, they all look like regular image viewing programs, but they only include additional functionality for viewing “invisible” information.
Wikipedia already contains a full comparison of metadata viewing programs with a detailed description of the platforms, supported standards and data formats. For the purposes of this article, for example, let’s take one program from the list presented, namely a program for viewing, editing and creating metadata:

It is shareware, i.e. the main functionality is free, but additional content is available to expand the capabilities. IN free version the user has the ability to:
- viewing EXIF, GPS, IPTC and XMP data;
- editing, creating EXIF, GPS, IPTC and XMP data;
- editing some Makernote tags;
- export EXIF and IPTC to XML format;
- import EXIF and IPTC from XML format;
- export EXIF and IPTC to MS Excel format;
- import EXIF and IPTC from MS Excel format;
- viewing descriptions of data fields;
- export EXIF and IPTC to text file (CSV format);
- import EXIF and IPTC from a text file (CSV format);
- export/import EXIF and IPTC to/from XMP.
Additional features in the paid version:
- processing multiple photos;
- import and export metadata into one file or several separate files;
- command line for editing and creating metadata.
The program interface is easy to use. You need to find a photo for analysis and its characteristics will appear in the menu on the right: thumbnail, technical metadata and EXIF, where you can find out the coordinates and use them to determine the shooting location:

How do I edit or remove photo metadata?
Hidden photo data can be easily changed using the built-in functions of the operating system and specialized software. The possibility of replacement is misleading and does not allow one to rely on metadata as a reliable source of information.
The simplest and most accessible way to change or delete“invisible” photo data - use the functions of the operating system (in the example, this is Windows 10):
- Upload or download a photo.
- Open “Properties” and go to the “Details” tab. Here, if not every field, then many of them are editable. To do this, just hover your mouse over the field with the parameter or click on it:
↓ Animated image click on it to view ↓
- At the bottom of the window there is a link “Deleting properties and personal information”, when you click it you will see:

Here you need to choose the most suitable option:
- Create a copy, removing all possible properties;
- Delete the following properties for this file (by selecting this item, you will need to select which characteristics will be deleted).
Change metadata You can also use online tools, of which there are countless on the Internet. One of these services is the IMGonline editor, you just need to upload a photo and click the “Edit” button:

After the photo is processed, a window opens which contains many fields available for editing, namely:
- EXIF information that can be changed, removed or added;
- IPTC information that can be changed, deleted or added;
- XMP information that can be changed, deleted or added;
- Application Record;
- IPTC NewsPhoto;
- XMP xmp;
- XMP Iptc4xmpCore;
- XMP iptcExt;
- XMP Photoshop:
↓ Animated image click on it to view ↓
According to comments from the author, in order to erase some EXIF string from a JPEG image, for example, geographical coordinates, you must leave this field empty. Lines without content are not added to the JPEG file or are removed if there was any information before. Remove EXIF completely and other “invisible” data from the image is possible using another online service from IMGonline:

The principle of its operation is as simple as in the previous case - you upload a photo and the output is a pristine image, which contains a small amount of technical metadata, without any identifying marks or characteristics.
And the last one way to edit and remove metadata- use a specialized program. Most often they come with full functionality, i.e. they provide the opportunity to both view metadata and make changes.
For example, we will use the same software as for viewing -. When you double click on the image, a window opens with a full set of metadata available for editing:
↓ Animated image click on it to view ↓
As you can see, the range of settings and possibilities is quite extensive for experimentation.
What to do if you couldn’t determine the metadata and find where the photo was taken?
“Invisible” information in photographs - great way obtain the information you need about a person or object, but here, as they say, “a double-edged sword,” since both you and attackers can use this information.
The collected data: geolocation, date and time, technical parameters and other characteristics can be used to attack a person or company, for example, using .
Main problem and benefit of metadata in the modern world - practically any editor or social network in which users share their photos, take care of security and erase metadata (replace them with neutral ones), which does not allow one to clearly identify where the photo was taken, with what device, etc. d.
At one time, Kaspersky Lab found out what interesting things can be learned from the metadata of photos on the Internet. From the results obtained, if we consider the most popular resources, then when published in:
These results were achieved for the period of 2016. 3 years have passed and a lot has changed. A repeated experiment was not carried out and is presented here only to show that, unfortunately, or, fortunately, not every photo, especially from social networks, will contain metadata with the author, date and place of shooting.
That's why answer to question: “What to do if you couldn’t find where the photo was taken?” - experiment. Having a photo available, you can find the person’s contact information, for example, phone number. Subsequently, and produce. In instant messaging, define a nickname. Do - get a number of other sources that a person uses, etc.
The Internet opens up a lot of possibilities for searching for information about photographs, people and objects. Metadata- is just one of the tools to achieve this goal and can serve as both an end point and a starting point. You can get metadata, but how to use it and for what purpose is up to you.
Knowing where a photo was taken is great for a personal archive, but before you publish it on the Internet, make sure to hide its metadata or at least GPS coordinates.
If you take a photo using a smartphone, go to the settings and remove the binding of geographic coordinates to the photo:

If your photos were taken with a camera, use any of the methods described above to change the metadata or delete them before publication.
You can find, if not everything, then almost everything on the Internet. Keep in mind that it's not just photos that contain metadata. There is some hidden information behind every digital file, so be mindful when publishing anything online and don’t forget about your own safety.