The KMPlayer is a free video and audio player that includes a number of the most comprehensive features.
Installing the KMPlayer video player
Video player KMPlayer download free for Windows You can directly from the official website of the program manufacturer. During installation, you can select individual components of the application, and inexperienced users, in order not to delve into technical parameters, can use the hint KMP and select the installation type - " Recommended".
Free distribution KMPlayer- not its only advantage. This video player has wide functionality and is very versatile. KMPlayer suitable for both XP, so for Windows 7 And 8 , eliminating the need to maintain other players for your computer to play different formats.
Rice. 1. Installing the KMPlayer video player.
Opening a video in KMP player
After launching the video player, the main window will open, at the bottom of which there is a playback control panel. Open a video file directly from a window KMP Player can be done in three ways:
- drag with mouse video file to player;
- press the button " Open file";
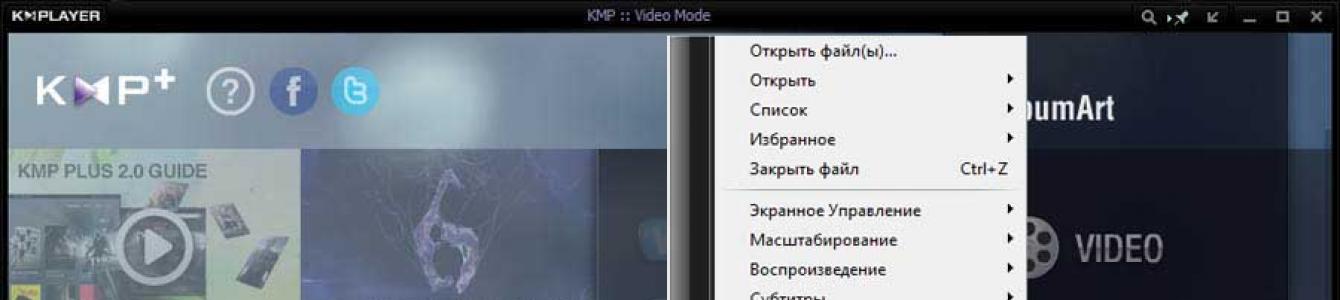
- press right click mouse anywhere on the player, after which it will open context menu, where there are points " Open" And " Open file".

Rice. 2. Opening video and audio files in the KMPlayer video player.
Controlling video playback in KMP Player
The most necessary control buttons for playing video in the player KMP located in the left corner of the program. We are talking about:
- switching from 2D to 3D;
- file list editor for the queue, which can also be opened using a hotkey combination Alt+E;
- control panel (key combination Alt+G), which includes permanent settings for video and audio playback, and also contains a link to the menu " Configuration" V KMPlayer;
- management of video filters, as well as video and audio streams.

Rice. 3. Buttons for controlling video playback in the KMPlayer player.
Setting aspect ratios for correct video display
A problem that often occurs is when the aspect ratio of the screen and the video file does not match. For example, iTunes has a widescreen ratio (16:10, 16:9), and analog DVD has a PAL and NTSC ratio, which has a 4:3 ratio, and so on. This can lead to the fact that the video will look distorted when played on a particular device, because not all computer players are able to solve this problem.
KMP allows you to manually switch the aspect ratio, easily eliminating this unpleasant visual effect. To do this, from the context menu you need to go to the section " Scaling" => "Screen Control".

Rice. 4. Video scaling in KMPlayer.
To set the correct proportions for the video being played, regardless of its resolution, you need to configure the menu correctly " Screen Control". If in section " Scaling"The choice of aspect ratio depended entirely on the monitor, but here the list of aspect ratios implies the proportions of the video player itself, and, accordingly, the video file.
For example, if the user is watching a movie on something other than full screen, then the aspect ratio of the monitor and video player may not match. If the video being played back is distorted, you need to change the ratio to " Original", and if the video has a non-standard resolution and proportions, then you will need to click " Don't maintain aspect ratio" and manually stretch the screen borders to the required size. A very useful option that, unfortunately, not all computer players have.

Rice. 5. Video aspect ratio in KMPlayer.
Managing audio tracks in KMP Player
If a video file has multiple audio tracks, then KMP allows you to quickly and conveniently switch between them. To do this, you will need to go through the context menu to the section " Audio" - "Track selection", where you have to select the desired audio file. By the way, the developers selected subtitles in a similar way, only they can be changed and disabled through the " section Subtitles".
As for audio processing, KMPlayer There is full frequency control, which not many computer players can boast of. In case of poor dubbing, when the actors' lines cannot be heard due to third-party noise, the " function will help Normalization", which scans and optimizes audio frequencies in real time.

Rice. 6. Manage audio settings in KMPlayer.
Configuration menu in KMP Player
In the menu " Configuration"almost all functions and capabilities of the video player can be configured KMPlayer. You can open it in three in simple ways using:
- control Panel, which was mentioned at the beginning of the article;
- context menu in the section " Settings" - "Configuration";
- "hotkey" F2.

Rice. 7. "Configuration" menu in KMPlayer.
An important point of the menu " Configuration"there will be a section" Decoders". Despite the fact that the standard video player codecs KMP active by default, video can be in a variety of formats. Accordingly, the standard decoder KMP Player may open a file with an error or play a video in poor quality. In this case, it is necessary to change the “default” decoder to the optimal system one.

Rice. 8. Section "Decoders" in KMPlayer.
Thus, KMPlayer has the widest range of options for both playing and managing video files, and a clear interface helps the user quickly find the desired menu and section, making it easy and enjoyable to work with this free, but very effective program. All this allows us to draw certain conclusions regarding the fact that KMP can easily claim the title of “best video player”.
Site administration website expresses gratitude to the author AlessandroRossi, as well as the editor Paffnutiy for assistance in preparing the material.
KMPLAYER2015
License type:
Quacked
Languages:
Windows 8, 8 64-bit, 7, 7 64-bit, Vista, Vista 64-bit, XP, XP 64-bit
Downloaded:
Setting up KMPlayer
KMplayer has many settings, allowing advanced users to customize anything they want. The abundance of all kinds of settings can cause panic among ordinary users. Therefore, usually no additional settings the program is not running and all files are played with default settings. However, it will be useful to change some options depending on the content being played. Moreover, any experiments with settings can be canceled.
The Reset Configuration button returns the settings to default values. You can get to the settings window either by using the F2 key or by right-clicking on the screen area, then “Configure” and “Configuration”


The player interface is well translated into Russian, so the meaning of the settings is clear if you know the meaning of some specific terms. Options with values other than the default values are indicated with a red line in the screenshots. In the first screenshot, the “Enable advanced menu” checkbox is checked. This option adds several useful commands to the main menu, such as the ability to take a screenshot of a video. The second has a list of built-in codecs. It is recommended to enable the VC-1 codec here as it is designed for HD video playback.
The “Decoders” tab allows you to select the codec option for the program. You can use codecs built into KMplayer, either installed ones, such as K-Lite Pack or CCCP, or system ones. The latter can (but not necessarily) help if the file slows down during playback.
Sound Settings


Sound settings in KMplayer are quite varied. You can add surround sound. There is a good equalizer. You can experiment with the sliders on other tabs. The "Standard" button returns the settings to default values.
Image slideshow settings

KMplayer has the ability to view photos (“Visualization” - “Slide Show”). There are also some settings here. To prevent the player from jumping from picture to picture chaotically, you need to uncheck the random display box. The Standard slide transition effect changes slides without video effects.
Association of files with KmPlayer.

KMplayer has a beautiful and convenient set of icons for media files. They are more informative than standard Windows. To associate them in the settings, you need to check the boxes next to the selected formats, or click “Select all”.
All settings in KMplayer are applied immediately, without clicking buttons like “OK” or “Apply”.
The difficulty of selecting suitable codecs for a media player often discourages beginners and less advanced users from switching to free programs. KMPlayer can partially solve this problem. When installing KMPlayer, you will not have to download numerous modules, because, as a rule, for the vast majority of tasks, codecs from the proprietary livabcodec library, included directly in the program, are sufficient. Among other things, KMPlayer differs from other programs for playing audio and video files in its ability to update missing codecs, read undownloaded and archived files, create screenshots, work with 3D, capture video and audio, as well as integrated applications, including games. The presented LAV assembly, unlike conventional versions, has an expanded set of decoders, splitters and registry settings.

Built-in codecs
To be honest, I was unable to make the player drift in front of the files I suggested. They say that the player will open a dialog box and offer to download the missing codec. The main feature of KMPlayer is the presence of the livabcodec library, which is impressive in size. However, in exceptional cases it may be necessary to update it. When updating the program, codecs are automatically updated, search new version occurs every time you turn it on if you have checked the corresponding item in the settings. To do this, press the F2 key and call up the control panel. In the “General” tab, check the box "Automatically check for updates".

KMPlayer supports third-party codecs, which you can download to your PC yourself online. In the “settings” menu, select the “decoders” tab, and then the required item "third party video/audio decoder" => "external decoder".

Working with subtitles
To use the available subtitles, you need to right-click, select the “subtitles” submenu, then “show/hide subtitles”. The same can be done using the Alt+X combination or in settings => "subtitle processing" => "show subtitles".

KMPlayer allows you to set the position of subtitles relative to the internal borders of the window. To change the position of subtitles in a sub-item "subtitle processing" select tab "subtitle alignment". Movement up/down can be done using the combination Ctrl + ъ or Ctrl + X, right/left – Alt + ъ or Alt + x, respectively.

3D viewing capabilities
Thanks to KMPlayer, there is no need to buy a 3D TV to watch 3D movies. A special 3D mode will turn any video file into a 3D picture. To do this, in the lower left corner of the program there is an icon “3D video cycle”. Possible modes "next to the image" And "above and below the frame" are activated by successive mouse clicks on the icon. Color channel parameters are changed in the “3D Screen Control” tab, which can be found after right-clicking on the image.


Sound tracks
If the film has several audio tracks, then switch them using the key combination Ctrl + X.

When you launch the program for the first time, you will be asked to make its initial settings. If you are an inexperienced user, then select the required language and the “default setting” item, i.e. default settings. If you have an irresistible desire to customize the program for yourself, then select “User define Setting”. Click next and follow the assistant's prompts. The reset is performed in “Settings” at the bottom of the window.


Popular questions
How to flip a video?
The player supports the ability to flip the input and output frames. To do this, use the combinations Ctrl + F11 and Ctrl + F12.
How to rotate a video?
You can rotate the image by calling the “control panel” using the Alt + G combination and pressing the corresponding arrows in the “Rotation” item.


How to change language?
The interface language can be changed by right-clicking through the “Language” tab.
How to slow down a video?
To change the playback speed, call the control panel with the Alt + G combination. Use the slider to adjust the speed. To return to the original settings, click “Reset”.


How to make the player be on top of all windows?
For positioning relative to other windows, KMPlayer provides 3 modes: “Never”, “Always in the foreground” and “During playback”. To activate one of the modes, successively click the “pushpin” icon in the upper right corner of the program.


How to make KMPlayer the default player?
To automatically launch KMPlayer when you open any media file, press F2 in the main program window, then select the “Associations/Capture” tab. To work, you will need the first two windows. In the first window you can select by file type (video, audio, graphics), and in the second - by its format.


KMPlayer doesn't play mkv format.
If the mkv format does not play, try downloading a suitable codec assembly, for example, K-Lite Codec Pack. Then share it for KMPlayer as follows: open the settings menu (F2), select the “decoder” tab => “external video decoder” => “find external decoder”. In the window that opens, click “Add.” external codec" or "Add. syst. codec".

How to take a screenshot in KMPlayer?
To create a screenshot, use the keyboard shortcut Ctrl + E, then save the finished image in the dialog box that appears. To quickly capture a frame without displaying a dialog box, use the combination Ctrl + A. We recommend pausing the video to get a clearer frame.
So you've installed KMPlayer and launched it for the first time, what next? Look at the main program window. Depending on the version, it looks simply like a black square, or like a window with a set of videos from the Internet.
Any video can be viewed by clicking on it with the mouse. But in reality there are few interesting videos here and we won’t waste time on them. It’s better to click on the vertical arrow on the bottom panel of the player, find the movie you want to watch on your computer and open it. Or simply launch the video in the Explorer folder - if during installation you did not uncheck the video file association setting, the film will open in KMPlayer.

Playback will start on the left side of the player. Click on the gray arrow button to close the interfering panel on the right.

Now you can enjoy watching.
Press the Enter button, or click on the dotted square icon on the top panel of the program to expand the playback window to full screen.

Press Enter again to return to windowed mode.
To pause playback, press the spacebar or click on the 2 vertical sticks on the bottom control panel. To rewind, use the arrows there or on the keyboard.

The volume is adjusted by scrolling the mouse and the slider on the panel.
Click on the gear icon to open the quick settings menu.

Here you can change the picture settings (brightness, contrast, etc.), turn on the equalizer, adjust playback speed and repeat, select subtitles and open the image and video capture menu.

If you open a movie in 3D format, KMPlayer will automatically recognize it and turn on the display mode in the same stereo pair as the launched video. The same applies to videos virtual reality. If KMPlayer does not automatically enable the correct display mode, select it manually by clicking on the 3D or VR button in the panel at the bottom left.

To open KMPlayer settings, press the F2 button on your keyboard (at this time the player must be running and its window must be active).

Here you can change the configuration of plugins, codecs and filters. For inexperienced users We do not recommend changing unknown settings, as this may cause problems with playback. But if you've already tinkered with something, click the "Reset" button to cancel all changes and return to the default values.

The latest version of KMPlayer can play video over the network. Click on the program icon in the upper left corner and select the “Open URL” or “Open FTP” command.

In the “Open URL” menu there is a ready-made list of Internet channels. Here you can open videos via direct links and save them to your list.

This is the basic thing you need to know about using KMPlayer on Windows 10, 8, 7 and XP. If you have questions or something in the instructions is not clear, write in the comment form below, the moderator will definitely help.
Please enable JavaScript to view the comments powered by Disqus.
Hello! Do you use Autorun? Windows system? Autorun is when you connect a storage device to your computer and your computer automatically launches a program that matches the content that is on the connected storage device. For example, you insert a CD with music and your music player automatically starts and starts playing it. So, those users who use this useful function can configure which video player to launch if there is a video recording on the inserted media.
Many users use to watch videos - both on the computer and on CDs - popular video player KMPlayer. But, if you insert a DVD-Video disc into your computer, then your favorite player KMPlayer WILL NOT be in the autorun options.
Competent specialists, of course, will go to "control panel - autorun" in order to add and select KMPlayer in startup settings. But! He won't be there either. This can be clearly seen in the image below. Although the KMPlayer program itself is already installed on the computer.

Why is this so? And everything is very simple - during installation, KMPlayer is not registered in the registry as an application suitable for working with DVD video. Although, it is quite obvious that KMPlayer itself reads DVD video discs perfectly. For reference, programs such as GOM Player or Media Player Classic are very suitable as programs for working with DVD video.
"What should I do?" — you ask?
The situation is fixable! KMPlayer can be registered on your computer as a program suitable for working with DVD video through autorun, using the settings of KMPlayer itself.
To do this:
1. Launch KMPlayer. We do this from a shortcut on the desktop or through Start-All Programs.
2. Click F2 for the player settings window to appear or opens the settings window in any other way known to you.
3. On the left side of the settings window (in the vertical column) we find “Associations/Capture” item. Let's go into it.
4. At this point, look at top part windows, go to the tab "Associations". In this tab, check the boxes “Video”, “DVD”, and also, if desired, “Audio”, “Audio CD”, located in the box under the inscription “Autorun CD/DVD XP”. It should look like the picture below:

When all settings have been successfully completed, click “CLOSE” and close KMPlayer itself. After completing the necessary settings, go to the Panel again Windows management, and in it - to the autorun settings. And now, in the section responsible for autorunning DVD video discs, the much-needed KMPlayer appears. We select it as the default program. Everything is ready! Now, when you insert a disc into your computer that it recognizes as a DVD video, KMPlayer will automatically launch and begin playing it.
Here's how the autorun setting changes after changing the settings in KMPlayer itself:

I hope everything worked out for you. Enjoy watching your favorite video using your favorite video player KMPlayer!