Macbooks are famous for their stable operation, but this machine is no stranger to software glitches, including critical ones, when only a reinstallation can correct the situation operating system. In this article we will tell you how to reinstall Mac OS.
However, before rushing to reinstall the system, you need to carry out one very important procedure - transfer important information to another device, because reinstalling will most likely damage the files on the Macbook.
Reinstallation
Is the information you need saved in a safe place? Great! Then we proceed to reinstall the system. This procedure, let’s say right away, is simple and feasible even for a non-advanced user, the main thing is to strictly follow the instructions. As for time costs, reinstallation will take about an hour.
So let's get started:

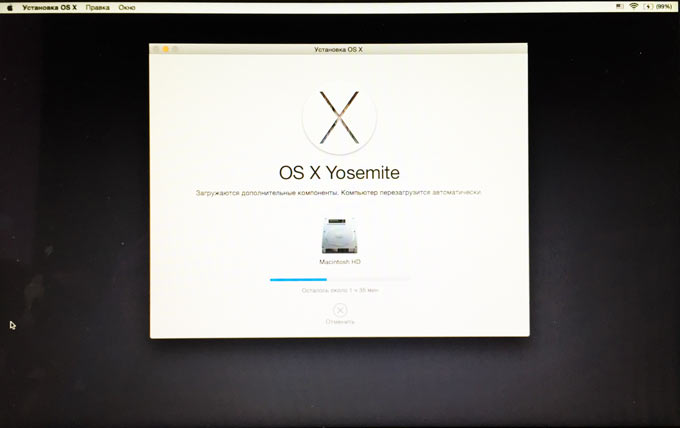
Well, you're almost ready - all you have to do is wait for the installer to complete its work and perform the initial setup of the device.
Initial setup
The initial setup menu will load automatically, you will need:

Once these items are configured, you will receive a Macbook with a reinstalled operating system. Please note that some initial setup steps can be skipped; in items that can be ignored there are corresponding buttons, for example, in item 8 you can click “Do not register”.
Let's summarize
Well, now you know how you can reinstall Mac OS on a MacBook, and it’s worth noting that this guide also works for Macbook Air, and for Macbook Pro. The reinstallation procedure, as we promised, is simple and straightforward; here, unlike Windows, you don’t even need any disks with the operating system - the laptop will download everything itself, the only condition is access to a high-quality Wi-Fi networks. We hope everything worked out for you, and if not, contact support or a service center.
2. After making sure that everything you need has already been transferred to the external drive, go to App Store And download the OS X Yosemite image.

This step will have to be completed in mandatory, since for clean install your account must first upgrade to OS X Yosemite. Only in this case will the Mac prompt you to reinstall OS X Yosemite (and not OS X Mavericks if you skipped an update from the App Store).

without updating through the App Store, you will be offered OS X Mavericks as a “clean system.”
So you first update the existing OS X Mavericks to OS X Yosemite through the App Store, and then perform a clean installation of the system.
After updating to OS X Yosemite via the App Store and successfully logging in, reboot.
3. As soon as a white screen appears before your eyes and the Mac makes the characteristic sound of the boot starting, press and hold the key combination Command+R. We wait patiently for the loading lane to pass.

4. We are greeted by a window OS X Utilities. Choose Disk Utility and press Continue.
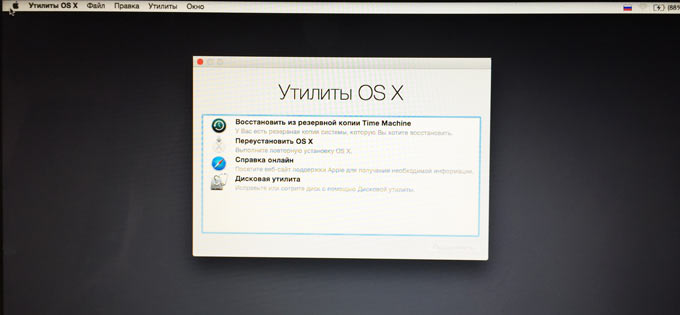
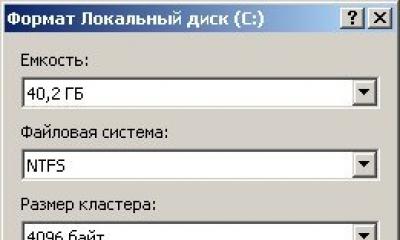
5. Choose Primary disk on which the system was installed, give it a name and select Erase. After a few seconds you will see a completely blank disk.

6. Close disk utility and go to point Reinstall OS X(in the OS X Utilities menu). Select the newly formatted disk as the target disk for installation. The installation will begin immediately.
When reinstalling the system from scratch, keep in mind that you must know your account password, used in Mac App Store. Otherwise, installation will not be possible.
7. Pay attention to the status WiFi connections (upper right corner) – Internet access is required, since the system will be loaded from Apple servers. Otherwise, you risk getting an error.

Depending on the load on the servers at a particular time, installation may take from 20-30 minutes to several hours. If you have the ability to connect using a power cord "twisted pair"– this can significantly speed up loading.
After the reboot, you will be greeted by the start screen of the new OS X Yosemite and asked to go through the usual “first login” steps.

Good luck installing and testing the new OS X Yosemite.
Greetings everyone! The question is indeed very useful, but as practice shows, not many users use this method of clean installation of the Mac OS X operating system. First, I would like to define what a clean installation of Mac OS is - it is complete reinstallation the same or a different version of Mac OS X to a pre-formatted disk partition.
Why do many people strive for a clean installation?
The answer is simply banal, in order to get rid of all the bugs, changes made and errors of the already installed operating system. Errors can occur due to the fault of the OS itself, for example, due to an error with access rights to folders and files, making any changes to system files when installing programs using the installation method, or through the fault of the user himself, who tried to configure something by forcibly replacing or changing system files. As a rule, such a change entails a number of consequences - the system begins to lag, slow down, and various errors appear during operation.
What you need for a clean Mac installations OS with data saving:
- Flash drive from 8 GB. The size of the flash drive depends on the installation method. If you have a saved installation Mac image OS on a PC or in the App Store, then you can write it to a flash drive using the terminal (the easiest way), using a disk utility (more difficult), for this you will need a flash drive of at least 8 GB. If there is no image, but you don’t want to use it from a torrent, then it is possible to install via the network using a recovery partition; to create a flash drive with a recovery partition, a 1 GB flash drive is enough - this method is perfect for owners of real Apple equipment; on Hackintosh, problems may arise problems, not always, but still. You will find how to cut an installation flash drive on our website; we have described a lot of methods for different Mac versions OS, so don’t be lazy to look through the sections or use the search.
- Backup Time Machine or installed system on another partition hard drive . After a clean installation, we lose all data: installed and configured programs, photos, music and much more, which takes a lot of time to restore and configure. This is exactly why we need a copy of Time Machine or the system on another partition; in this case, we will extract only the information we need and will not affect system files - the Mac OS installer itself will not allow us to replace them with damaged ones. As a result, we will get a brand new and clean OS, but with our own programs and personal files, documents, photos, videos, music, etc.
At first, the process is no different from a regular installation. We insert a flash drive, boot from it, go into disk utility and format the hard drive partition on which a clean Mac OS will be installed, and start the installation. After some time has passed, we will see this window; it is the settings from it that will allow us to save our data!
In this window we need to select the first item - Transfer data from Mac computer, PC under Windows control, Time Machine backup, or boot disk. Select this item and click continue.
We choose what we will transfer from installed system on another partition or from a Time Machine backup.

Select the backup date from which you want to transfer data. In my case, there is only one copy, so the list is almost empty. If you use Time Machine for a long time and create automatic copies, the list will be more impressive.

After which we will be provided with a list from which we can choose what exactly we want to transfer. Programs, documents, music, photos, system settings and the like. From this list, select everything.

We select, confirm and wait until the information is transferred to new system. The duration of this procedure directly depends on the amount of data being transferred and the speed of the hard drive.
After which we log into ICloud or skip the step - this is the same as during a normal installation. Account with this method it does not require creation, it will be transferred from the specified location, so the password will be from the same account.
After this is done, we get the purest Mac OS, but with the full amount of our information and working programs on board, and we can immediately get to work, rather than copying, installing and configuring.
Attention hackintosh people. When transferring data in this way, all the kexts that you previously needed to install on the system, such as network, video, for USB, etc. , will be transferred from the copy and will not require re-installation. But if you manually patched ALC or another quest, you will have to repeat the procedure, since the installer will not skip the changed files. You can also delete a blank kext from the Mac OS library and install a modified one taken from a copy using the kext utility.
The second way to transfer data to the OS:
The second method is not much different, the procedure is absolutely the same, but it is already suitable for users who did not use the Migration Assistant during installation. You can also transfer all data from another installed operating system or Time Machine copy. But in a slightly different way.
Most users traditionally switch to a new version of OS X by simply clicking the “update” button in the App Store. Undoubtedly, this is the easiest method, but at the same time it is not always the most effective, since over time, many Mac users notice that their system is no longer as fast as it was at the beginning of operation, and updating does not solve the problem.
Users who constantly change and reinstall software on their Mac are especially susceptible to this problem. The reason for the decrease in performance is precisely various system garbage and “residues” from remote programs which safely remain in place during the update. That is why many people prefer to install a “clean system”.
Things to remember before installing from scratch
First of all, be sure to back up your system. To do this, the standard set of OS X programs includes a wonderful Time Machine utility.
Also be sure to make sure that all your contacts, calendars, mail, etc. synced with iCloud (settings>iCloud)
Clean installation of OS X El Capitan step by step
2. Reboot the Mac while holding down the key option(aka alt).
3. Select a USB flash drive as boot media.
4. After the Mac boots Recovery from the USB flash drive, visually it will happen like this:
open Disk Utility and format it hard drive Mac.
5. To do this, select the hard drive partition in the panel on the left, then in the top panel click erase(do not change the format and name) then click again erase(down).
6. After formatting is complete, close Disk Utility and select reinstall OS X.
7. In the next window, select only the formatted hard drive and after completing the installation process you will receive a crystal clear OS X El Capitan.
By the way, you can reinstall the system from scratch without bothering with a flash drive. True, you need to have Capitan installed on your Mac before, also from scratch, otherwise the version of the system that came “in the box” will be installed.
So, if such a need arises, then restart your Mac while holding cmd+R, open Disk Utility and format the hard drive as shown above. Then you also choose Reinstall OS X and wait for the installation to complete.
In some cases, to restore your computer's functionality, Apple may need to perform a clean installation of the system. In the article below we will tell you about the features of this procedure.
The operation of installing an OS completely includes the steps of creating a backup copy of files, burning an installation flash drive, cleaning the hard drive and installation itself new version systems. Let's start in order.
Step 1: Backup Files
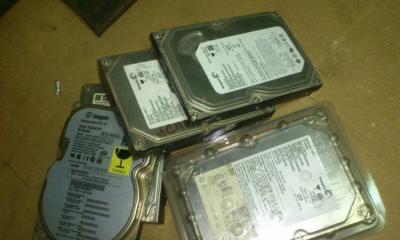
A clean installation of the system involves complete removal user information from the internal storage, so it is best to copy all important files (documents, photos, videos, program installers) to external device or to cloud storage.
Attention! A Time Machine backup will not help, since it also saves settings that must be completely reset during installation!
It would be a good idea to check if your computer is linked to an Apple ID. To do this, go to « System Settings»
from the Dock or through the Apple menu. 
Next click on "iCloud".
Check option status "Find Mac". If this feature is enabled, after a clean installation of the system you will be required to enter Apple data ID for authorization and continued work with the computer. 
Make sure you remember these credentials.
Step 2: Create a bootable USB flash drive
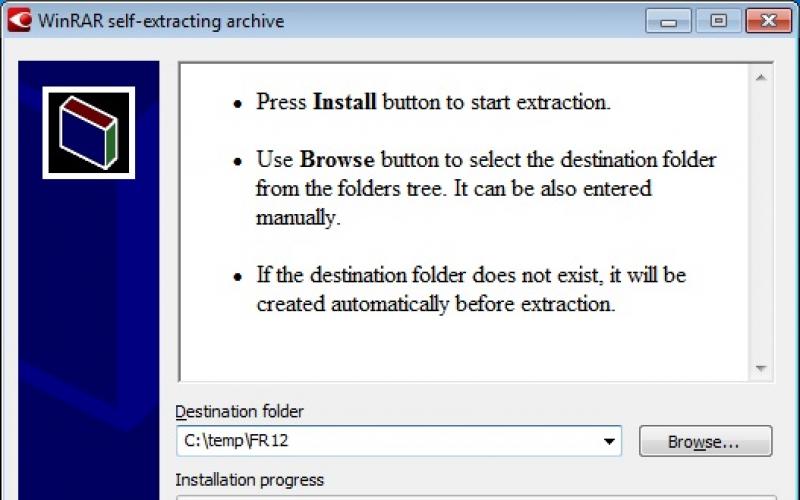
The easiest way to reinstall the OS from scratch is using a bootable USB flash drive. To create it, you will need to download an image of the required operating system from the Mac App Store (for example, the latest macOS Mojave) and write it to a suitable flash drive. We have already covered this procedure in detail, so please refer to the relevant section of the material at the link below. 
Step 3: Clean up the main drive
The operation in question requires a complete formatting of the Mac's internal storage (HDD or SSD), which can be done in recovery mode.

Step 4: OS Installation
The actual procedure for installing macOS is not difficult and is typical - follow the link below step by step description this operation. 
The only note is that when the option is enabled "Find Mac" You cannot skip the step of entering your Apple ID.
What to do if the installation was incorrect and the computer does not work
If something went wrong during the installation process (for example, you accidentally turned off or rebooted the device, or there was a power outage), you can restore the device’s functionality through the same recovery mode: install a previously installed OS using a Time Machine backup or reinstall the system from factory settings.
Conclusion
As you can see, the procedure for a clean installation of macOS is quite standard, and the sequence of actions does not differ from those for other operating systems.