
memo " How to insert audio into a presentation
Prepared by N.A. Kalyakina,
methodologist MBOU DO TsDOD
Using animation and sound in creating a presentation, you make it even more advantageous. Naturally, you need to concentrate on the semantic load, but a beautiful design definitely does not hurt. All necessary sound files can be found on the Internet. There are even more than enough of them.
This presentation is easy to make with Microsoft programs Power Point, most often installed on a computer along with an office suite. But not everyone knows how to make a presentation with, i.e. add background music to it.
You will need
A computer
Power point program
Music file you want to use
Instruction
1. Copy the music file to the same folder where the . This is not necessary, but it will save you problems with playback in the future, especially when transferring to another computer.
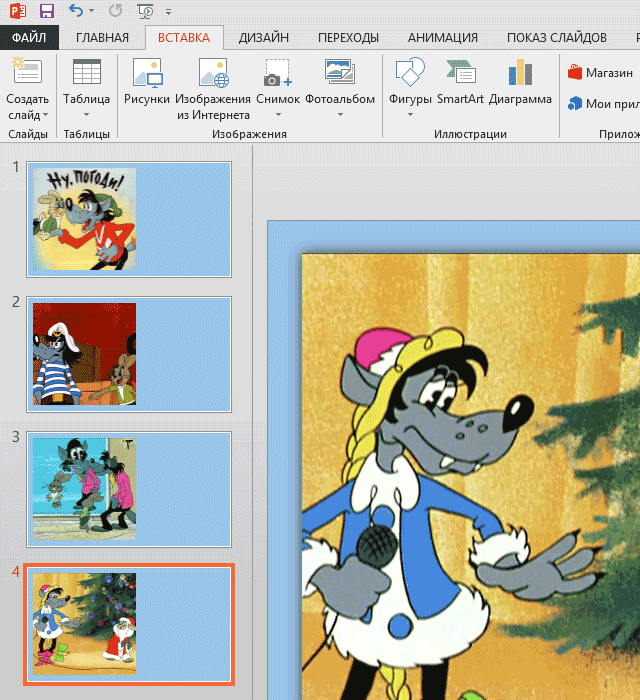
2. Open and select the slide where you want the sound to start.
On the Insert tab, in the Media group, click the Sound icon. The explorer opens. Find the required file and click OK.
When you add a sound, the "Do you want to play sound automatically or on click?" box will pop up. Choose the option you need. Everything, the music file is inserted.
3 . On the quick access panel in the "Sound Options" group, check the boxes: play "Continuously" and "Hide on display". You can also adjust the volume there. Ready. You set up in one slide.
If you want it to sound throughout the presentation, proceed to the next step.
4. Select the Animation tab and click Animation Settings.
In the Animation Settings task pane (panel on the right side of the screen), click the arrow to the right of the music file, select Effect Options.
A window with playback settings appears.
Check "End" - "After" - and insert the slide number after which the music should stop. For example, after the last slide.
The music will now play in the background for the entire presentation.
note
The above steps are for the package Microsoft office 2007 and above. If you are using Office 2003, the sequence will be similar:
- Insert the sound: "Insert" - "Movies and Sound" - "Sound from File" - select the file - "Play Automatically" - Customize: "Slide Show" - "Animation Settings" - "Effect Options" - finish after the desired slide .
Useful advice
Using the playback settings, you can not only put music in the background of the presentation, but also use several different melodies, insert speaker text and different sound effects. This will help make your performance bright and memorable.
How to add music to video? Use Movavi Video Editor and this simple guide.
Install Movavi Video Editor
Download the video editor in Russian from our website. Once the download is complete, run the program's setup file and follow the installation instructions.
Add video and audio to the program
Launch our video music overlay software and select New project. Click the button Add files and select the video you want to add an audio track to and an audio file to use as the soundtrack. The files you upload will be automatically added to the appropriate timeline tracks: video - on Video track, audio - on Audio track.
Adjust audio duration
When you combine music and video, you may find that the added video and audio file have different durations. There are two options here.
- Audio file is longer than video. Click on the audio, move the slider to the end of the video file on the timeline and click on the icon with scissors. Then click on the unwanted sound clip and click Delete on the keyboard to delete the fragment.
- The video is longer than the music. Add multiple copies of the selected audio file to the audio track (click on the file right click mouse and select Copy, and then Insert). Trim off the excess.

Remember that in Movavi Video Editor you can insert multiple audio tracks into a video at once. For example, one track can be used for background music and another track for sound effects.
Save the result
Adding sound to video turned out to be quite simple. Now it remains to record everything in one video file. Click the button Save and select one of the export options from the tabs on the left side of the window. The program will prompt you to save the video to the Movavi Library folder. You can change the folder if you wish. Specify video format or model mobile device and press the button Start. When the saving process is completed, you will find the finished video file in the selected folder. Now you know how to add audio to video!
Replacing the soundtrack in a video file has proven to be an almost win-win artistic solution. This technique, which is widely popular both among viewers and among those who like to give new life to old or unsuccessful videos, has gained new opportunities with the development of online journalism and the spread of sites that provide users with their own platforms for posting amateur videos. By overlaying a new sound on a video, you can easily.
Most popular programs
Program developers did not stand aside and offered their own options for creative solutions, as a result of which today overlaying sound on video, as well as, has become an accessible tool for everyone. The most popular were programs that do not require special knowledge and training of the user, their distinctive features user-friendly interface and versatility are recognized.
As for the last point, users disagree: some simply do not need too many options, since a minimum is enough to implement their ideas, an overabundance of functions confuses them. At the same time, for many of them, one of the most significant criteria is multilingualism. Despite the variety of requirements, we still managed to form an approximate top list of the most popular programs for overlaying sound on video:
- Windows Movie Maker;
- Corel Ulead Video Studio;
- CyberLink PowerDirector;
- pinnacle;
- Sony Vegas Pro 8 and its modifications.
Having considered in more detail the advantages and weaknesses of each of them, it is easy to see that the undisputed leader in this list is movie maker. The reason is simple: the program is natively built into Windows, so it is always at hand. In addition, the set of functions is recognized by many users as the most optimal and easy to use. In addition to sound, the program also creates additional video effects, such as slowing down or speeding up, transitions, negative, sepia, adding titles or other images to the frame. Corel Ulead Video Studio o is a tool not only for editing video files, but also for creating animated videos, and the built-in function smart package allows you to organize your work with the necessary folders, thereby optimizing the process.
Many people prefer to have several video editors at their disposal ^ as practice shows, Pinnacle Studio and Corel Ulead Video Studio complement each other perfectly.
Learn more about the features of some editors
All of the above video editors have built-in devices that allow you to quickly and easily edit the sound in the video. This is necessary to create a high-quality video clip. After all, only those who know how to combine sound and video can create a great video. And no less important is knowing how to combine video and sound correctly. These programs are quite easy to use. What needs to be done is displayed step by step in the pop-up windows. These are kind of tips on how to mix video with sound.
In a programme Pinnacle Studio there are buttons on the control panel, and tracks at the bottom of the window, focusing on which even a beginner creating his first film can easily cope with how to overlay sound on video. This is one of the best tools for processing footage and film editing. Using it, there is no need to look for additional information on how to fit the sound to the video. FROM Pinnacle Studio easy to operate.
Pinnacle Studio will not only tell you how to insert sound into the video correctly, but also teach you how to replace the sound in the video if it turned out to be not quite suitable for the created frames.

Often, musical compositions are included in the scenarios for holding various festive events, in which sound overlay is required. Any of the video editors can easily cope with this task. In addition, they provide such a function as replacing the sound in the video, if it becomes necessary to change the voiced text. In order for the scoring of the film to be organically combined with the plot and the action taking place in it, synchronization of video and sound is necessary.
This feature is available in one of the best video editors movie maker built into Windows. Thanks to it, any user will not only easily cope with the imposition of sound on video, but also learn how to edit the sound in the video so that it is clear and well perceived.
Sometimes it is necessary to overdub sound on music, for example, when creating a sound greeting card or video messages, when poetry or any other text is read with musical accompaniment. Movie Maker is also great for layering sound on sound. If the soundtrack of the movie is not entirely successful, the video editor will tell you how to change the sound in the video.
Today, slide shows are very popular, in which viewing your favorite photos is carried out with music or voice accompaniment. The answer to the question of how to insert sound into a video to create a slide show can always be found in one of the video editors.
Video editors are quite complex programs that have many different functions. These are reliable helpers for a person who already has certain skills in how to edit sound in a video. For those who are just starting out on the path of video creators, it is better to use the basic, built-in operating system editors. They are less functional, but they do quite well with how to overlay sound in a video. Using these and other similar programs, you can feel like a director, and embody it.
The video below explains in detail the principles of overlaying sound on a video or other audio track.
Inserting sound into your PowerPoint 2013 presentation slides is easy and simple. To add an audio file to a presentation slide with hard drive you need to do the following.
1. In an open presentation, click the tab Insert.
2. Select the slide where you want to add the audio file.
3. Click the button Sound in a group Multimedia on the control ribbon. A list will open with possible ways to add sound files:

4. Select an item Audio files on the computer to add an audio file from your computer's hard drive. A dialog box will open.

5. Select the desired sound file on your hard drive and click the button Insert. A sound file icon in the form of a loudspeaker will appear on the presentation slide.

6. By clicking on the icon of the sound file and holding the left mouse button, drag the icon to the desired location on the slide.
7. To listen to the audio file, click the Play/Pause button. To adjust the sound volume, click the turn the sound on or off icon and move the slider on the scroll bar until you set the desired volume.
It turns out to insert sound on slides is very simple. Now, during the launch of this slide, the selected sound file will be played.
If you don't like a sound file, you can quickly delete it. To do this, click on the sound file icon and press the key Delete.
This is not the first time, due to the specifics of my work, different people ask me the same question - “how to add music to a presentation?” And then with variations - either you need it to play only on one slide, or to play the entire presentation without stopping (in the background, so to speak). Well, I'll try to answer this question 🙂
So, from the last lesson, we already have a preparation of the presentation. Let's figure out how to add music to it. Go to the menu Insert-> Video and sound. A window appears in which we choose which file we will open:
An icon with a speaker will automatically be inserted into the previously selected slide, which means that the track is inserted into the slide and will automatically play when it is shown. Since during the demonstration this icon is displayed as a black square, it is advisable to either reduce it and place it in the corner, or even take it out of the visible borders of the slide (this will not affect playback).
When the speaker icon is selected, additional buttons appear on the panel below:
With their help, you can adjust the volume, listen to the track (during the demonstration, it will still be played from the beginning), loop its playback or turn off the sound altogether.
Performs similar functions media player. To open it, go to Tools->Media Player. A window will appear that is very similar in terms of the set of buttons to the panel for working with inserted sound:
Plus, it has an Apply button that allows you to insert sound into a separate slide in the same way as the previous option.
However, neither approach allows you to control playback directly during the demonstration. In order to be able to do this, let's select some element on the slide where music is needed - for example, text or a picture. Select it, right click context menu and go to the Effects tab (it is located to the left of the main workspace). There, click the Add button, in the window that appears, go to Various Effects and select the Play item:
Now let's set up this effect: set the Start item to the C previous position - this way the music will start immediately after the transition to the slide, without unnecessary gestures on our part. Press the button next to the Property item and in the Effect settings window that opens, change the Sound parameter: Sound->Other sound and, as usual, select the desired track:
It will be applied, however, it will not be displayed in the Property section - this is normal. Similarly, you can set the music to pause and stop the sound completely. All of the above options work within one slide.
However, these options are not suitable for those who want play one track throughout the presentation. For such a setting, go to the Slide Change->Change Transition->Sound tab, select the Other sound item, open the desired track and check the Continuous checkbox (without it, we will get an analogue of all previous options):
So we got a single sound background that does not react to the change of slides within the presentation.
In this article, we tried to consider the basic techniques for working with music in LibreOffice Impress. However, if you still have questions, you can ask them below - in the comments or on our forum. We will try to answer them promptly 🙂